By Jessica Lau · October 16, 2026
I teach classes asynchronously at a local college, which means I spend a lot of time trying to find new ways to create fun and engaging content that students will actually log in to watch.
My lectures are all built on Google Slides, so naturally, Google Vids—Google’s AI video generator—caught my eye. Vids lets you generate video clips from natural language prompts, complete with narration (from you or an AI avatar), music, and actions. You can even turn snoozetastic slides or Google Docs into a dynamic video.
Here’s everything you need to know about how to use Google Vids.
Table of contents:
What is Google Vids?
Google Vids is an AI video generator that allows you to create videos, complete with images, voiceovers, and background music. It’s powered by a mix of Google models, including Gemini, Omni, Imagen, and Lyria.
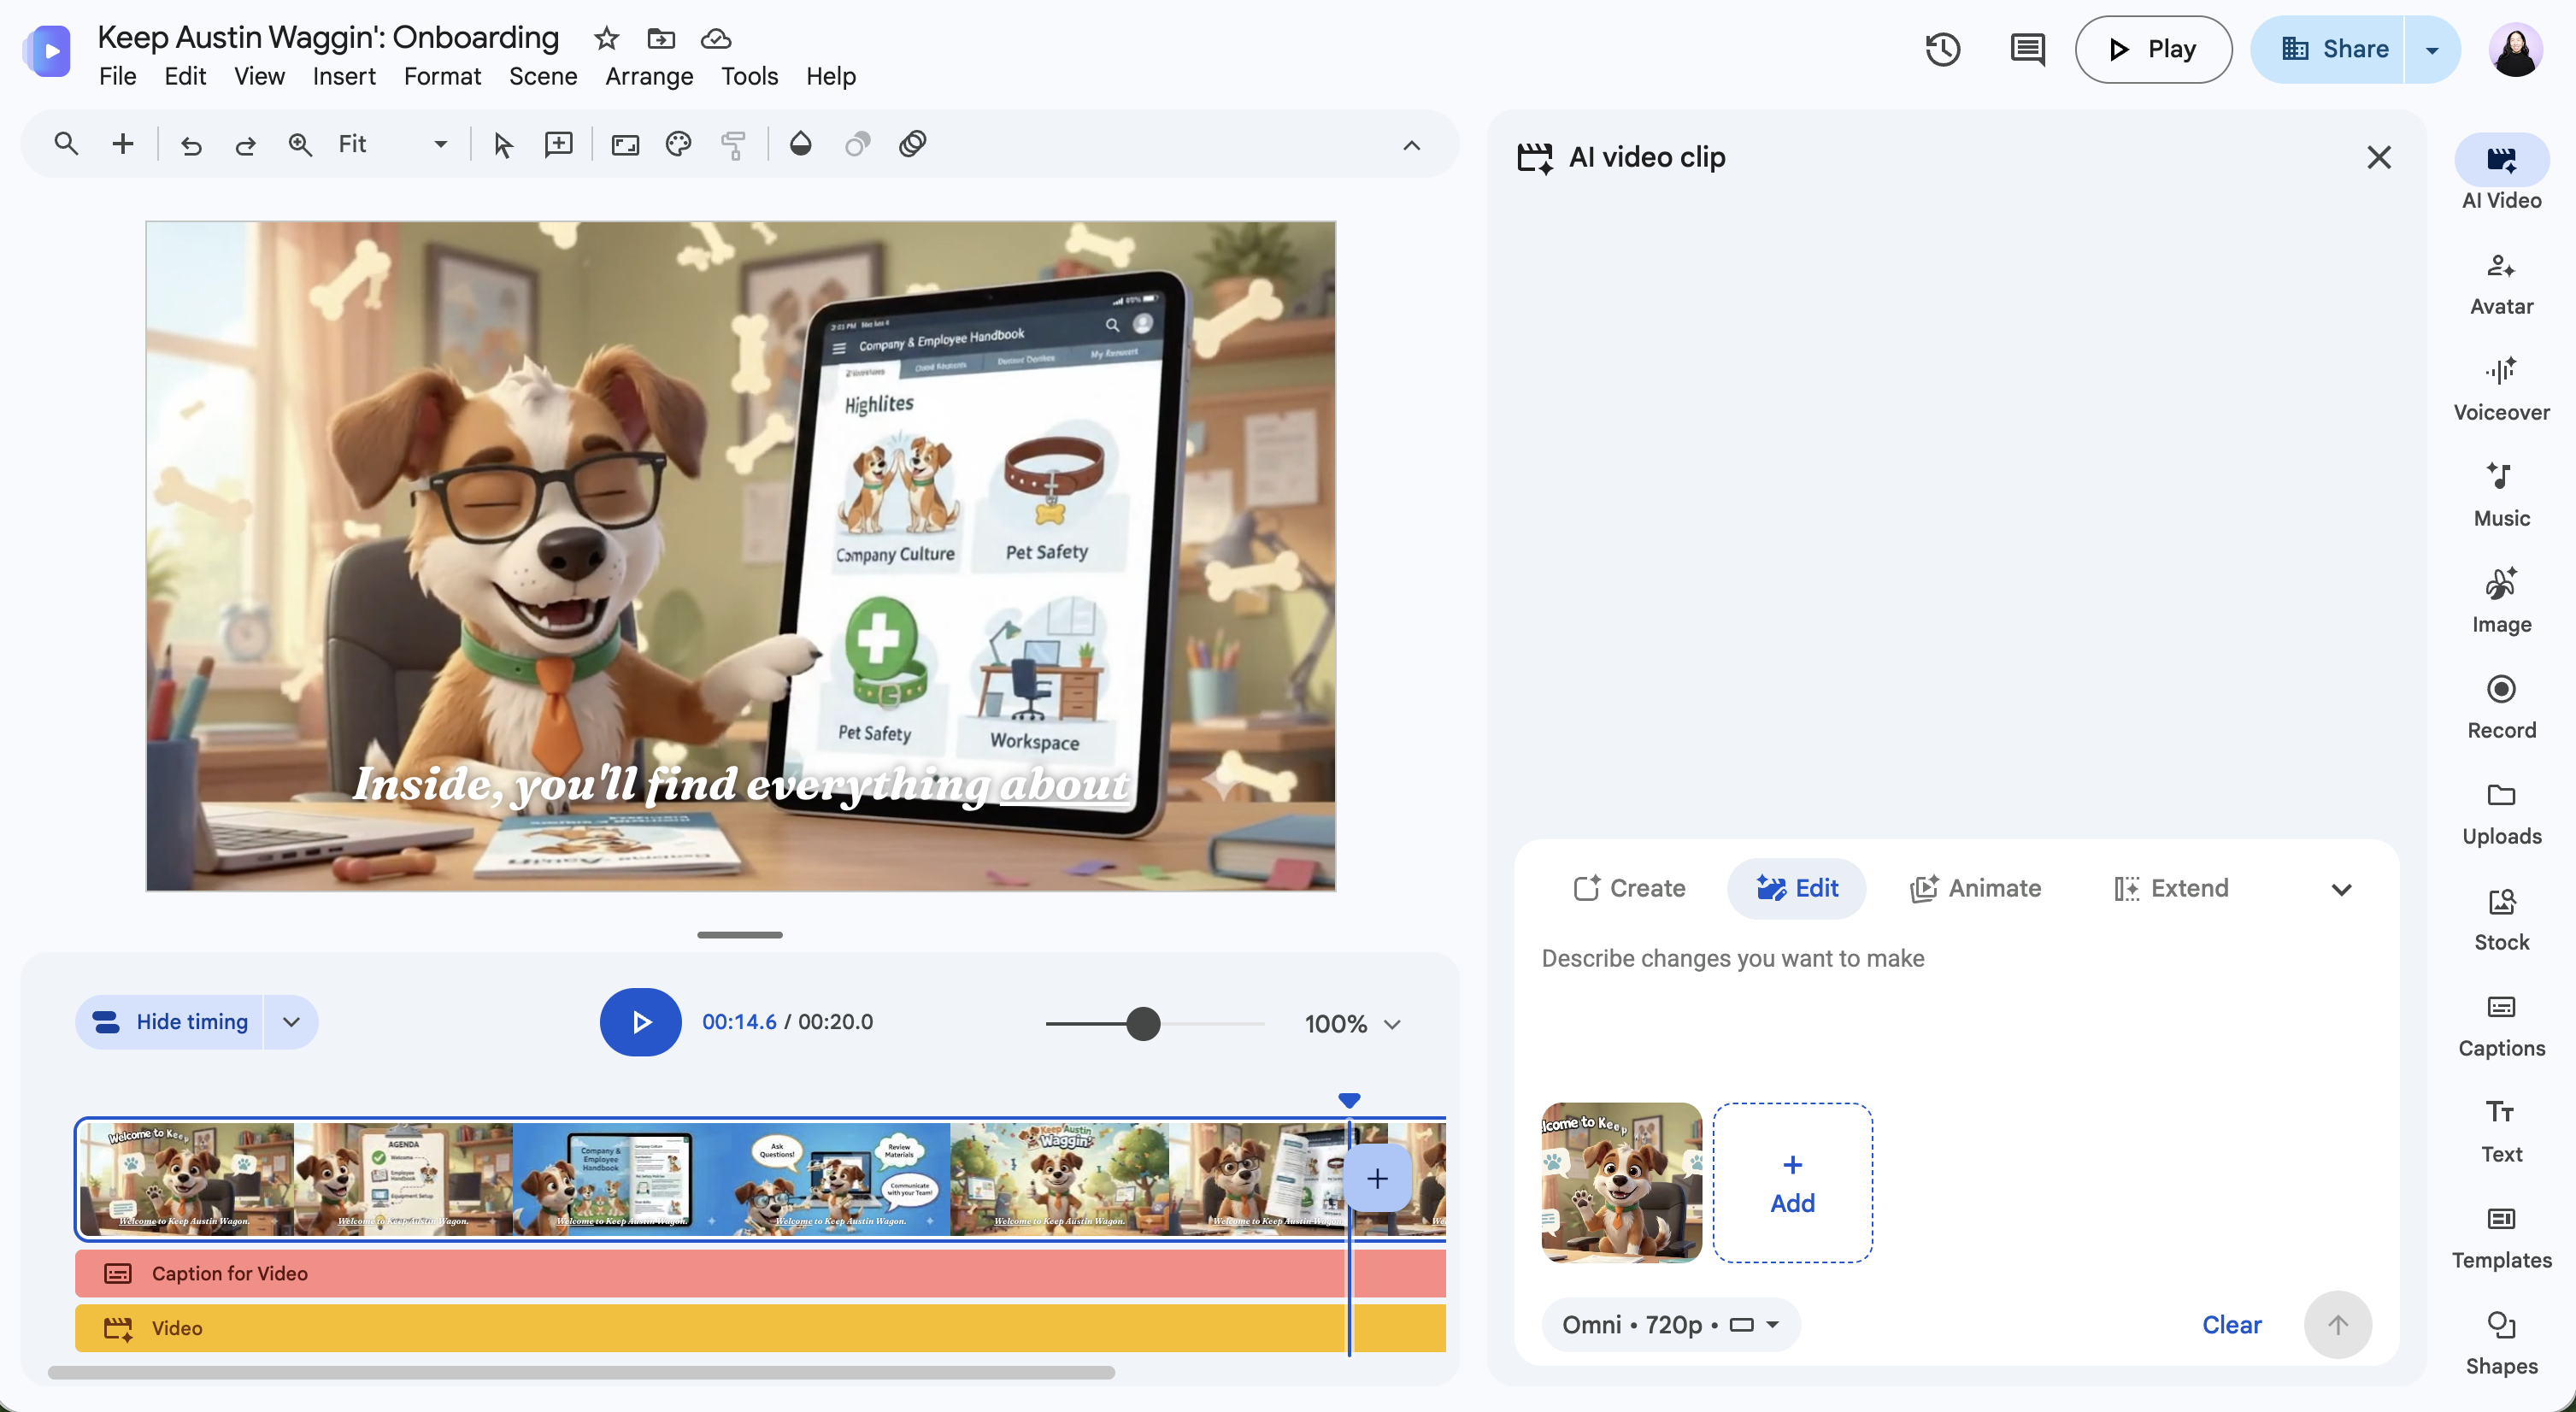
At first glance, Vids feels like a mix of Google Slides and Gemini. Scenes in Vids resemble slides in Slides. Both apps share many of the same formatting tools. And you can add all the same media types to Vids as you can with Slides: animations, transitions, GIFs, and photos from Google Drive and Google Photos. But Vids also lets you import new media types to your projects, including:
-
Stock photos, videos, and music
-
Screen recordings (with or without a video of you)
-
AI-generated photos and videos
-
Voiceovers and AI avatars that narrate your script
-
Google Slides presentations (that then convert into videos)
Before you run to Vids to make your next feature film, a caveat: Google Vids isn’t an app for making SXSW-level movies. But, for my money, it does a really impressive (if not a little unnerving) job of creating engaging informational videos—particularly for product demos, team updates, meeting recaps, and onboarding videos. Here’s a quick example to show you what I mean.
Is Google Vids free?
Google Vids is free to use with a personal Google account and covers the basics, plus a handful of monthly AI credits to generate AI video clips and avatars. That’s plenty if you’re making the occasional video. If you’re cranking out videos every week, you’ll hit that cap fast. That’s when it makes sense to upgrade to Google AI Pro, which starts at $19.99/month, or higher. Note: You’ll get the same Vids limits on the lowest paid tier, Google AI Plus, as your personal plan.
Vids is also included with Google Workspace plans, but your admin decides whether you can use Vids (and its AI features). If you don’t see the app or its AI options, that’s probably why.
How to use Google Vids
There are numerous ways to get started with Google Vids: from scratch, from a template, from a Google Doc or Google Slide—the list goes on. Here, I’ll show you how to create an AI-generated video since it’s how most people use Google Vids.
-
Go to vids.new. You can also go to docs.google.com/videos, but that URL is longer, and it adds an extra step. (You’re welcome.)
-
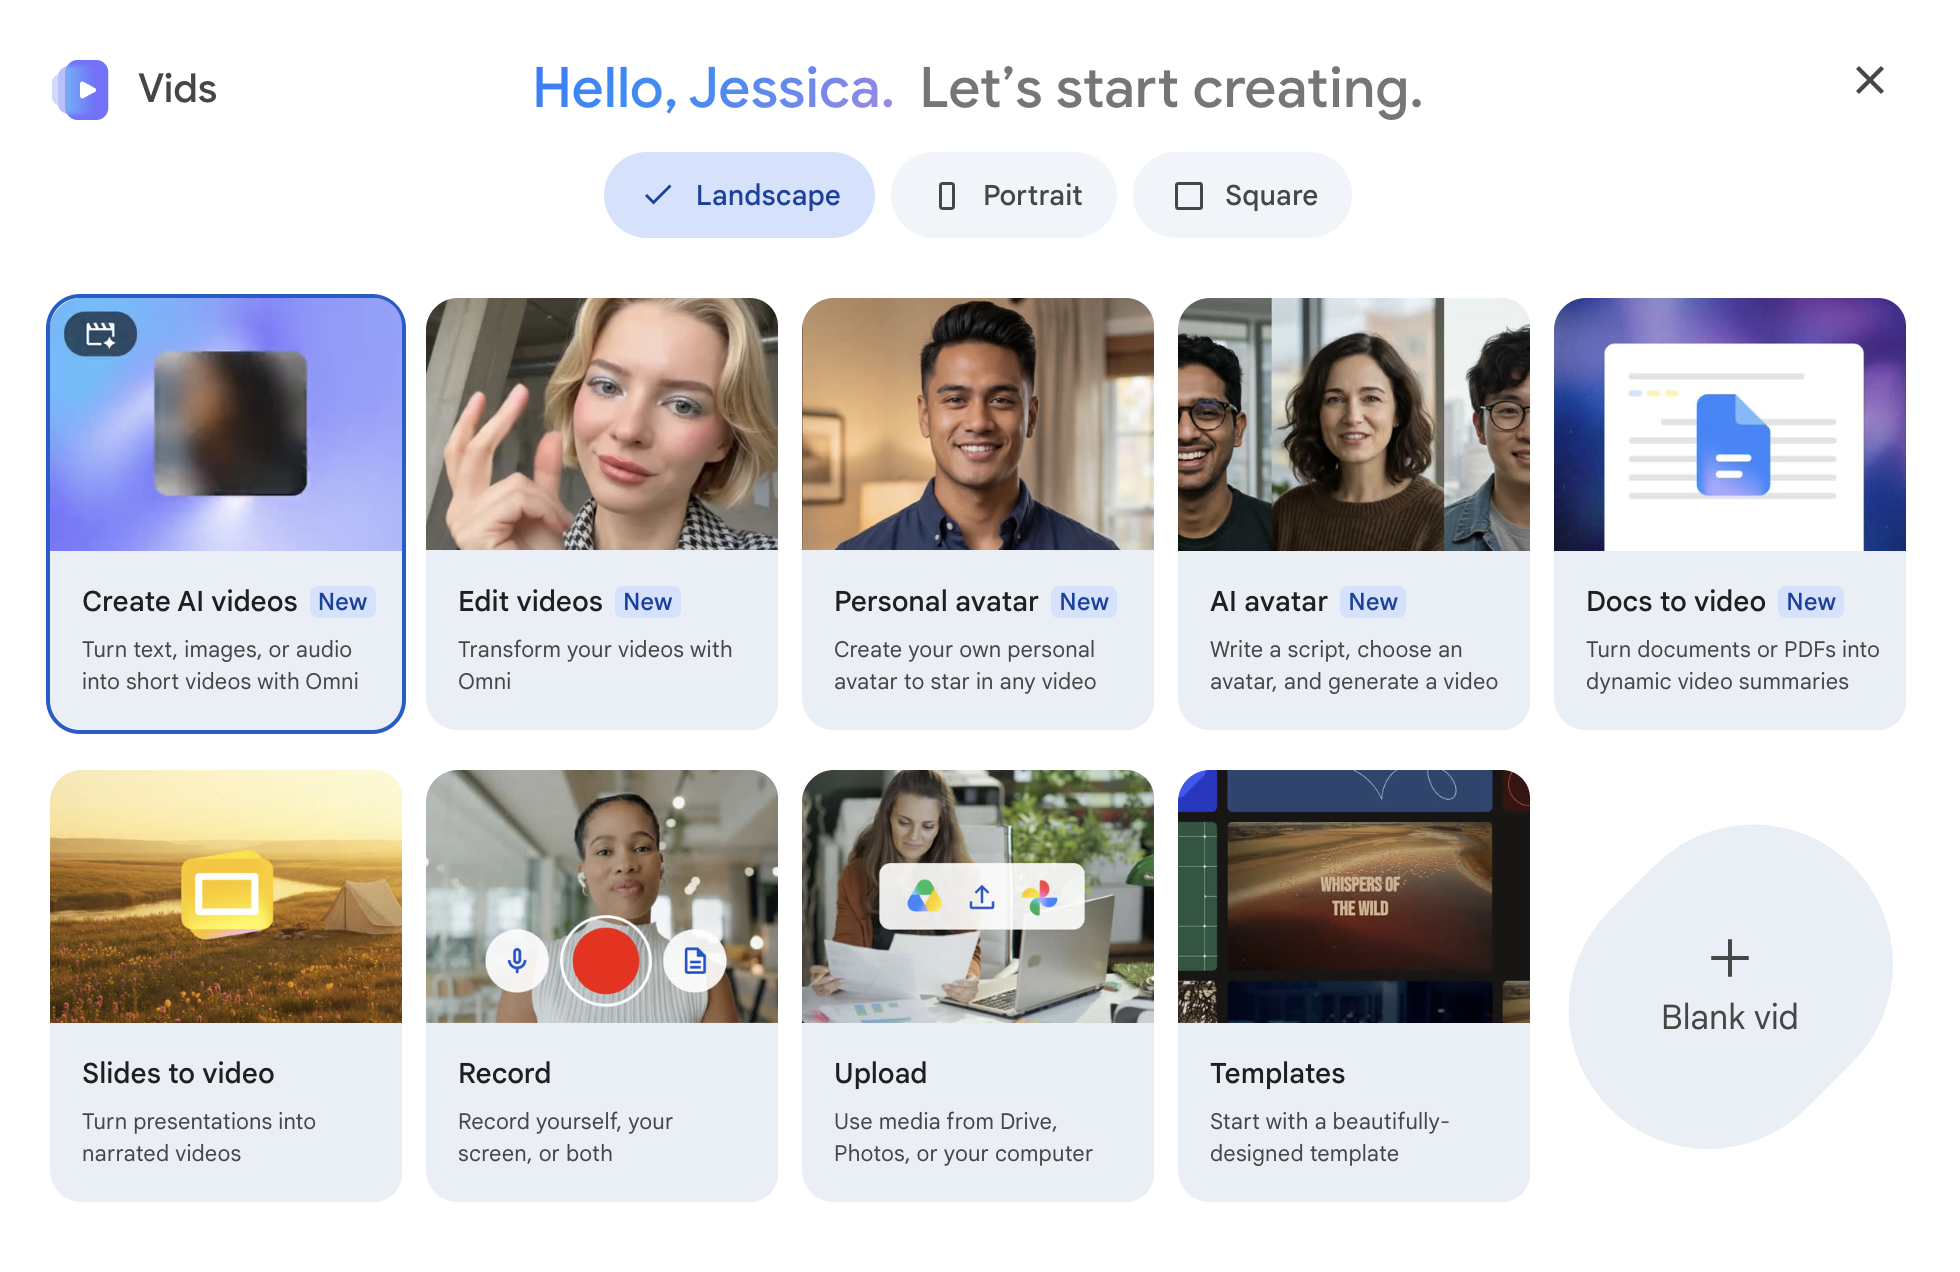
On the welcome screen that appears, choose:
-
Orientation. By default, your video is set to Landscape. But you can change this to Portrait or Square.
-
Video-creation method. Here’s where you can choose how to get started with your video: from scratch (“Blank vid”), using an avatar, from Google Docs or Google Slides, and more. If you’re following this tutorial, click Create AI videos.
-
-
Enter your AI prompt in the message bar (right-hand panel). If there are specific images you want to include, drag and drop them into the Ingredients area.
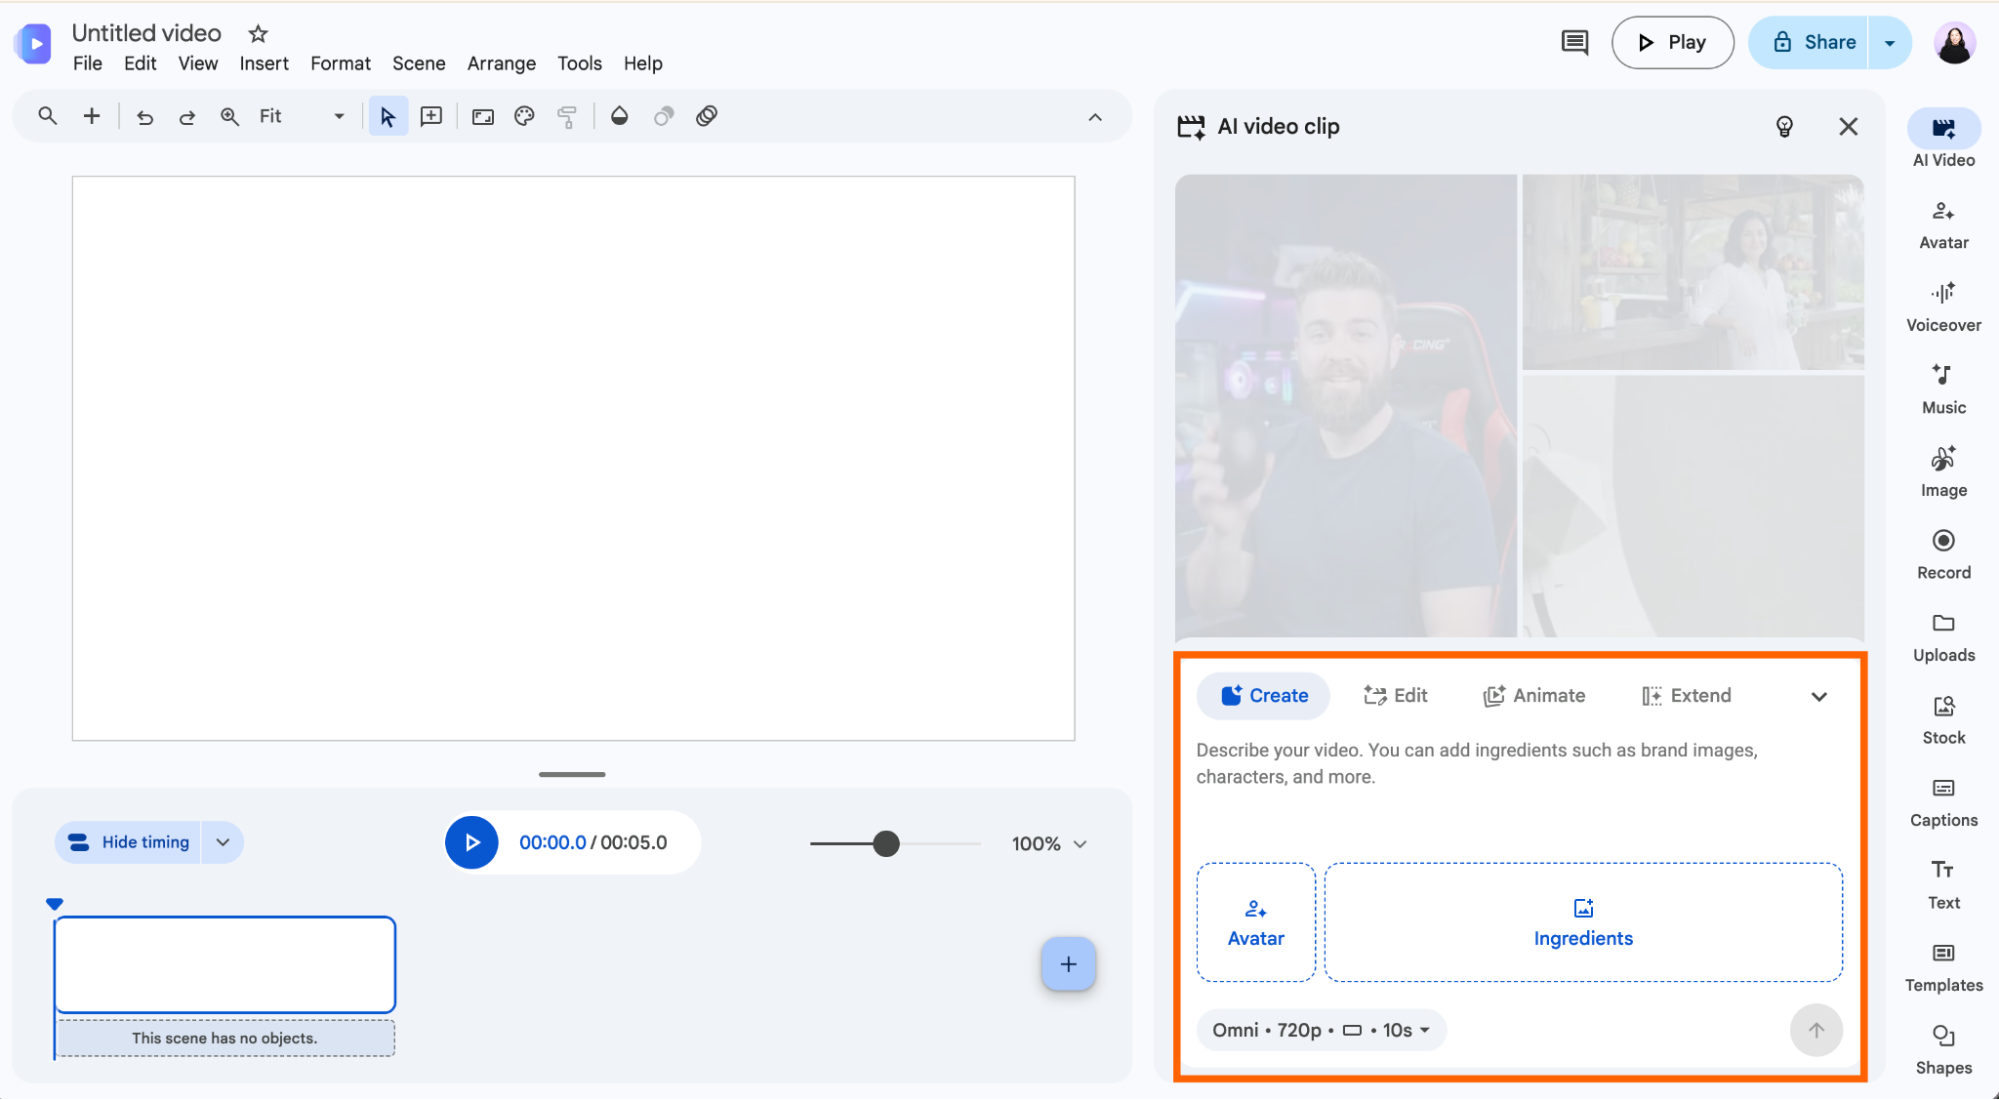
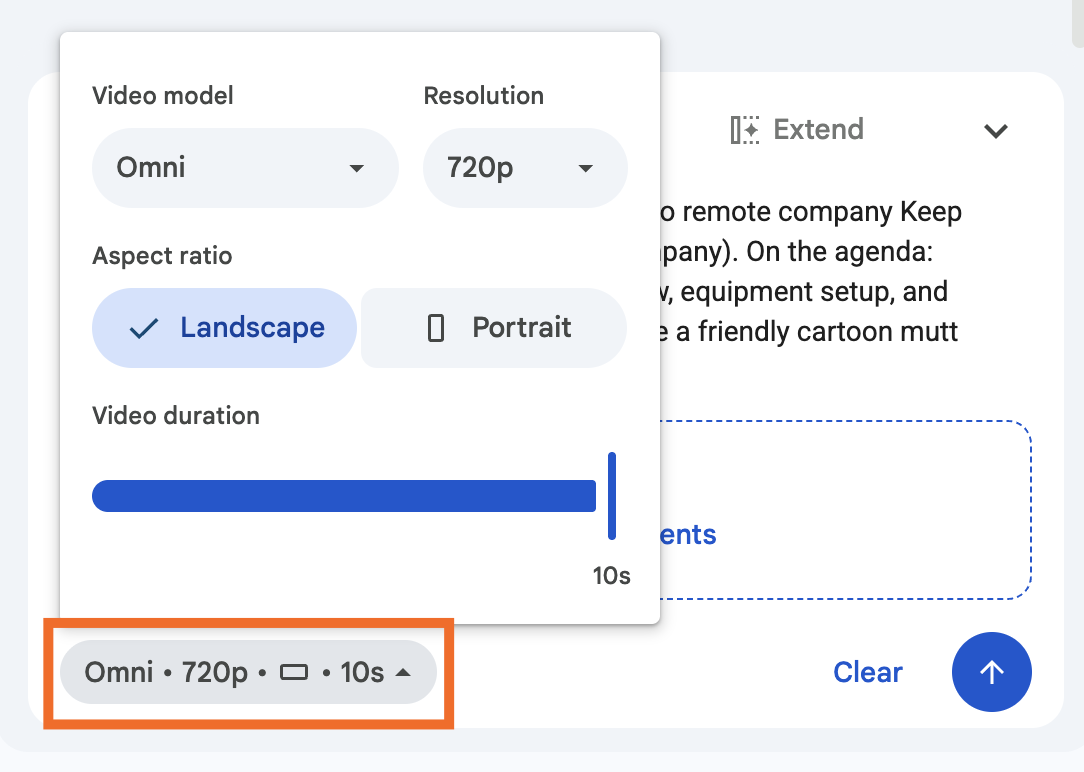
You can also click the model/resolution dropdown to change the video model, resolution, and duration.
-
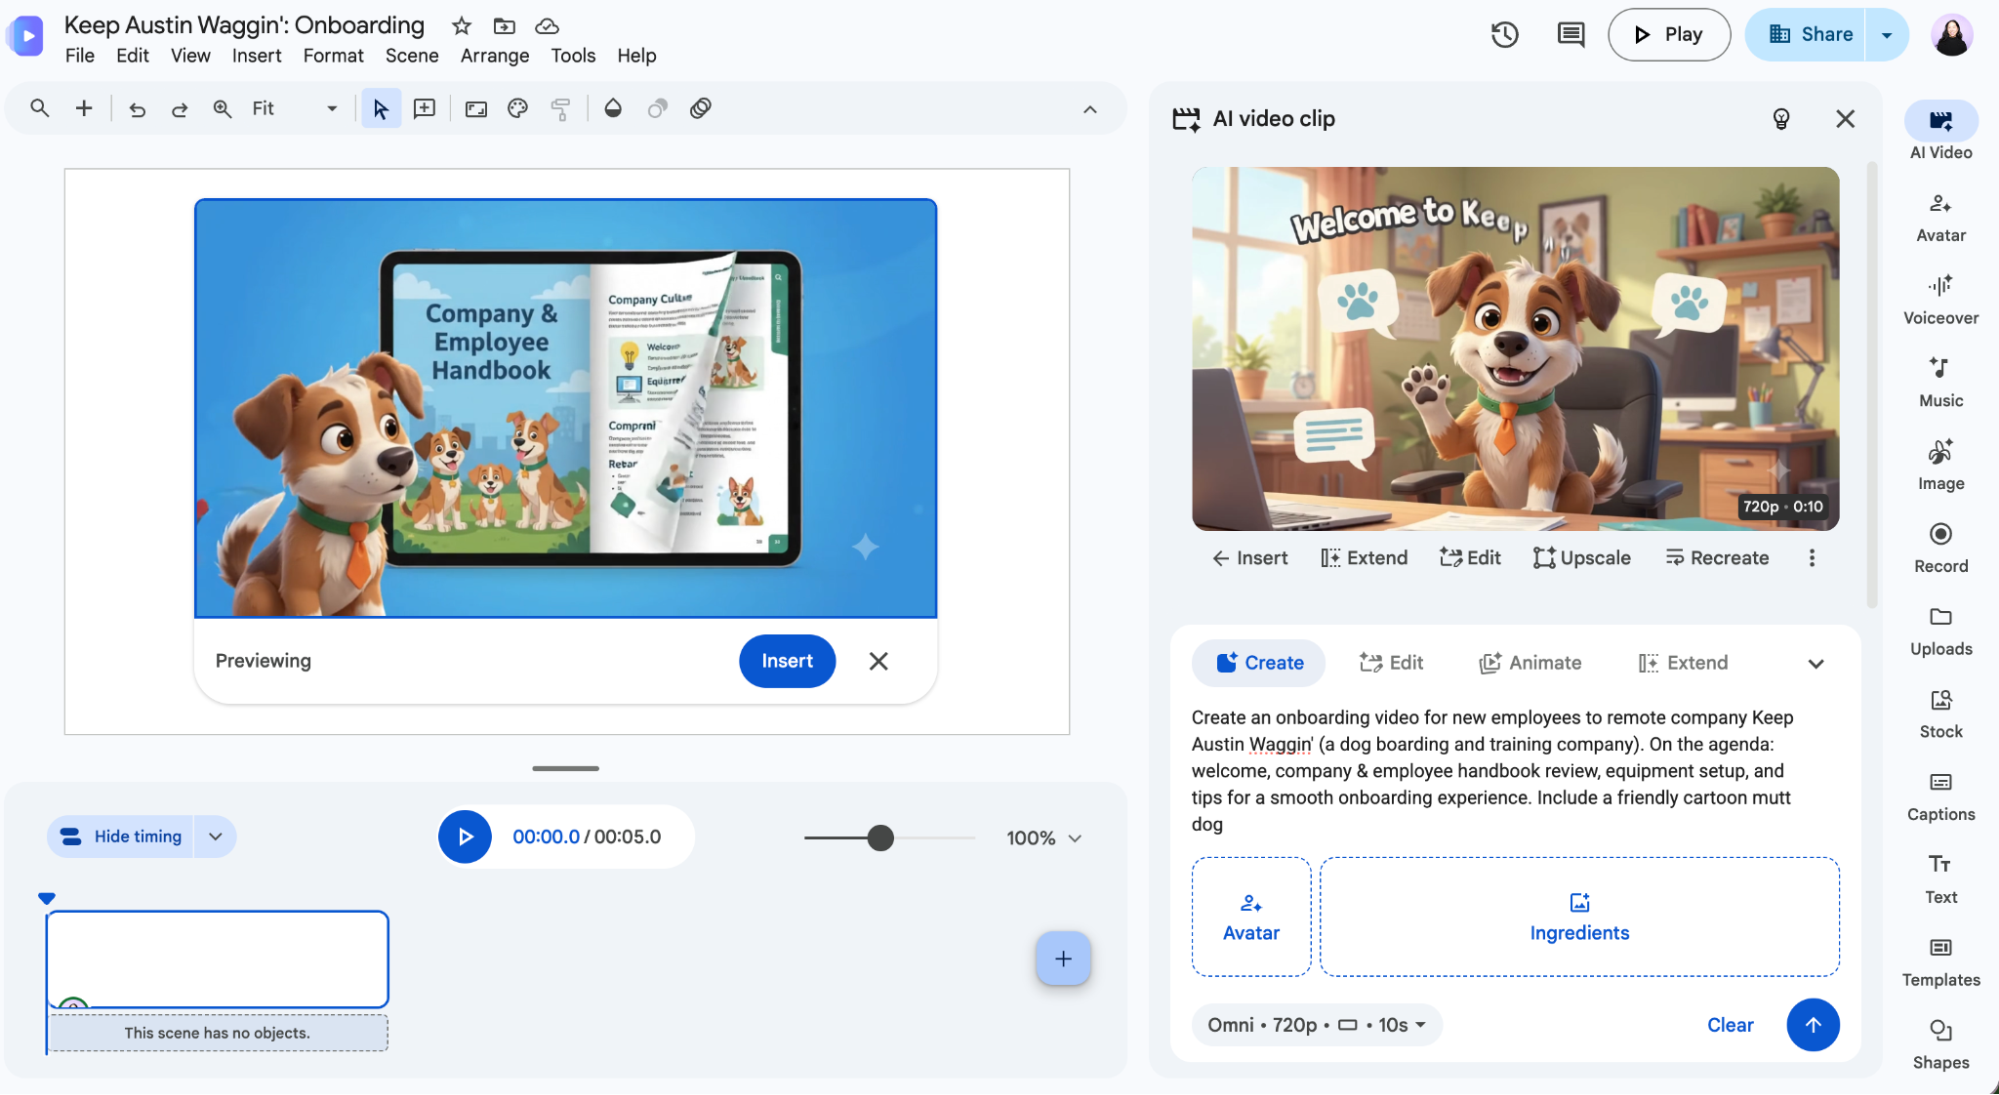
Once Google Vids has generated a video, you have a few options:
-
Preview the video. Hover over the video clip to review it.
-
Add it to your canvas. Click Insert to add the video to your canvas (left-hand panel), and click Insert again in the canvas preview (as shown in the image above).
-
Extend the video. Click Extend, write a new prompt (tell Vids what you want to happen next), and hit Enter.
-
Edit the video. If the video isn’t quite what you want, click Edit, and enter a new prompt.
-
Retry the prompt. You can also stick with your original prompt and go for a new result. To do this, click Recreate.
-
-
To add a new scene to the video, click + in the timeline or use your keyboard shortcut:
Ctrl+M.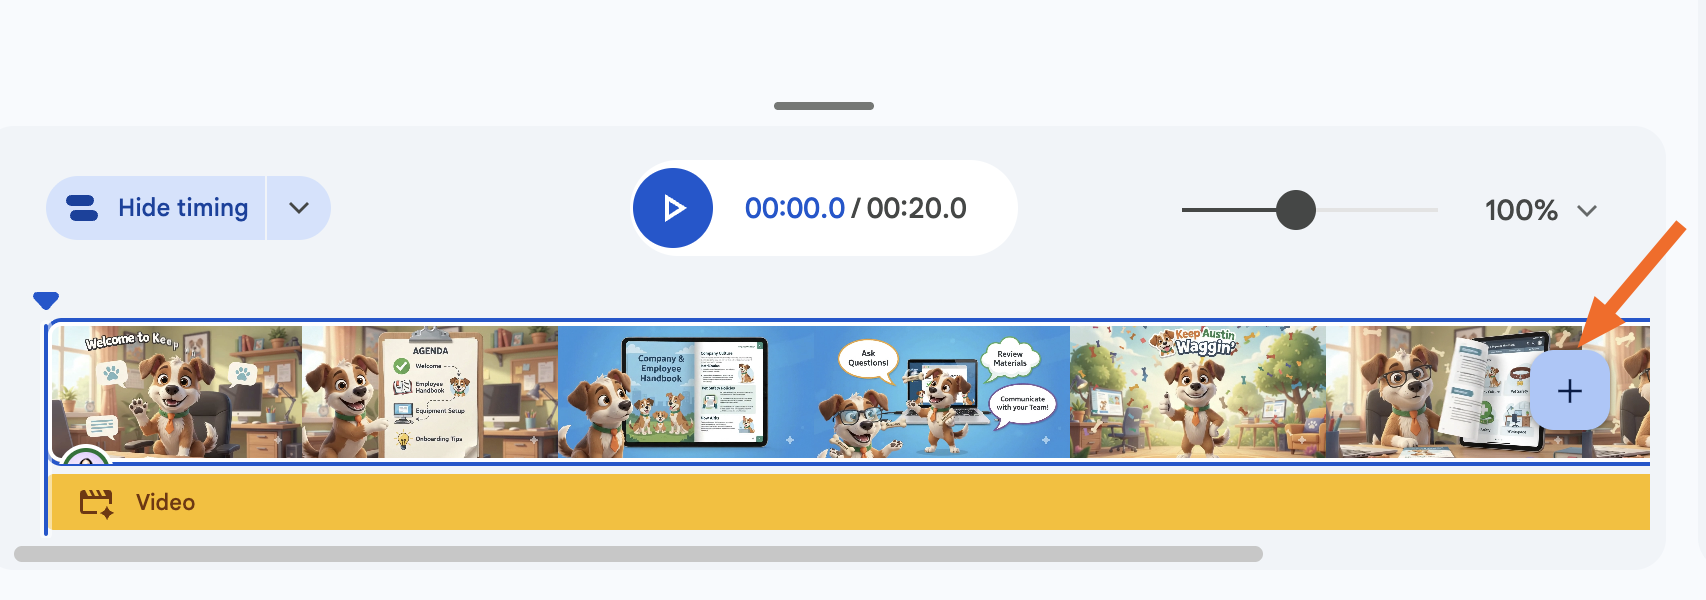
-
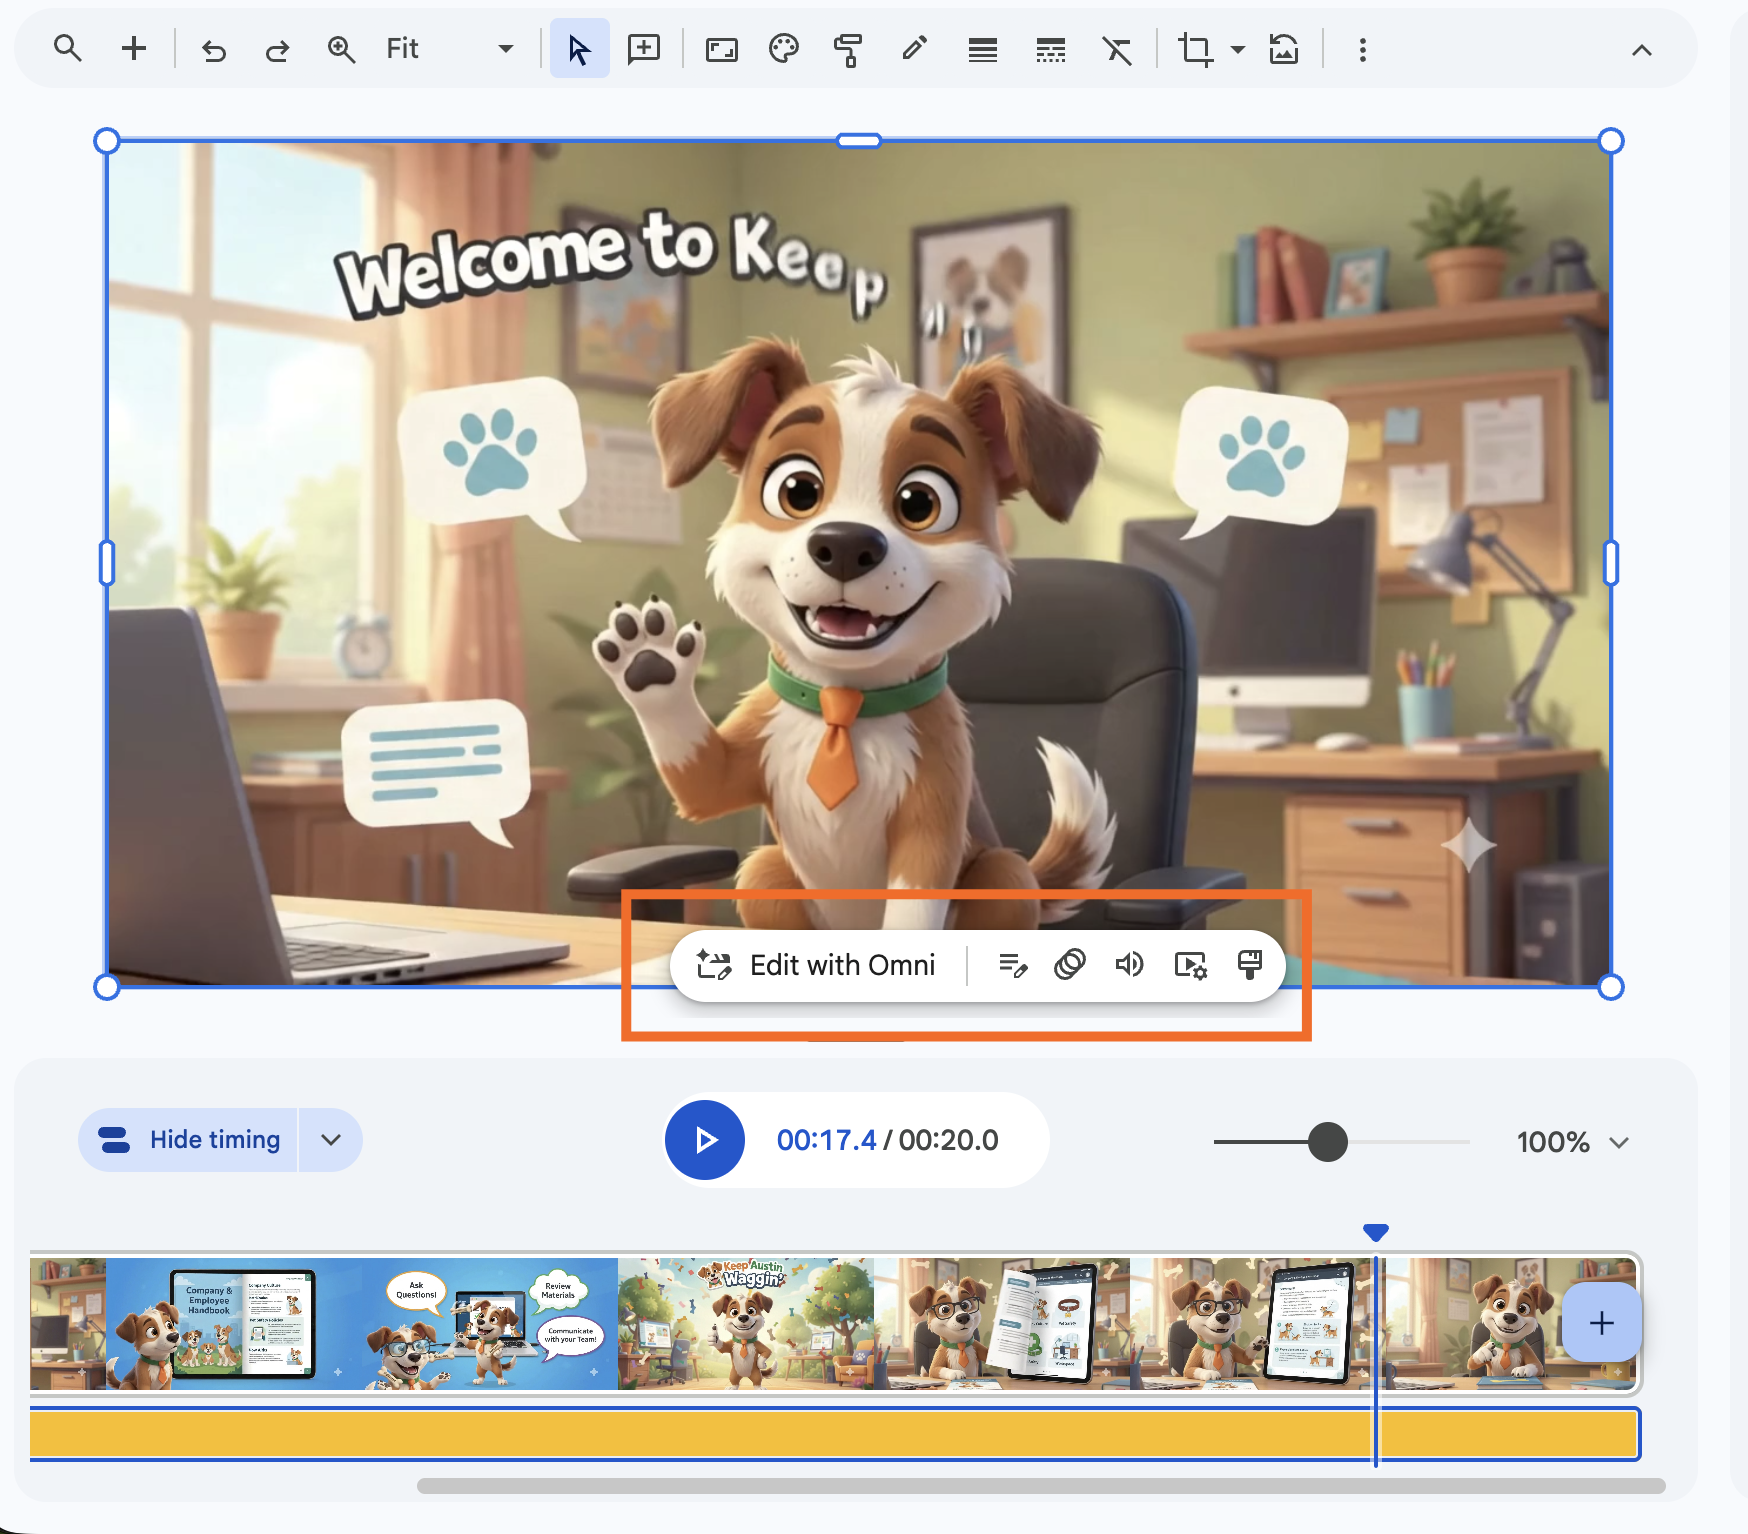
You can edit video clips added to your canvas even further. Click the scene you want to edit on the canvas. From the floating toolbar, you can (from left to right of options):
-
Edit the scene. Click Edit with Omni to edit the clip as you normally would.
-
Edit the transcript. If your video has narration or voiceovers, the easiest way to edit them is via the transcript. Cut or add words, and Vids will update the video to match.
-
Animate the intro and outro of each scene. You can animate how your scene enters or exits the screen—like fade, spin, or my personal favorite, toaster (the clip pops up like a slice of toast!).
-
Adjust the audio. You can adjust the sounds in any scene, as well as the audio that plays between transitions. If you have narration over background music, you can even adjust those levels so people aren’t forced to physically lean into their computer just to hear what the voice of God is saying.
-
Loop the video. If you want your video to play on loop, you can do that. Or you can modify when the video starts and stops (without looping).
-
Format your video. These are the classic image controls that allow you to resize and reposition the video on your canvas. You can also add a drop shadow (for what purpose? Your guess is as good as mine) and add alt text to your visuals.
-
-
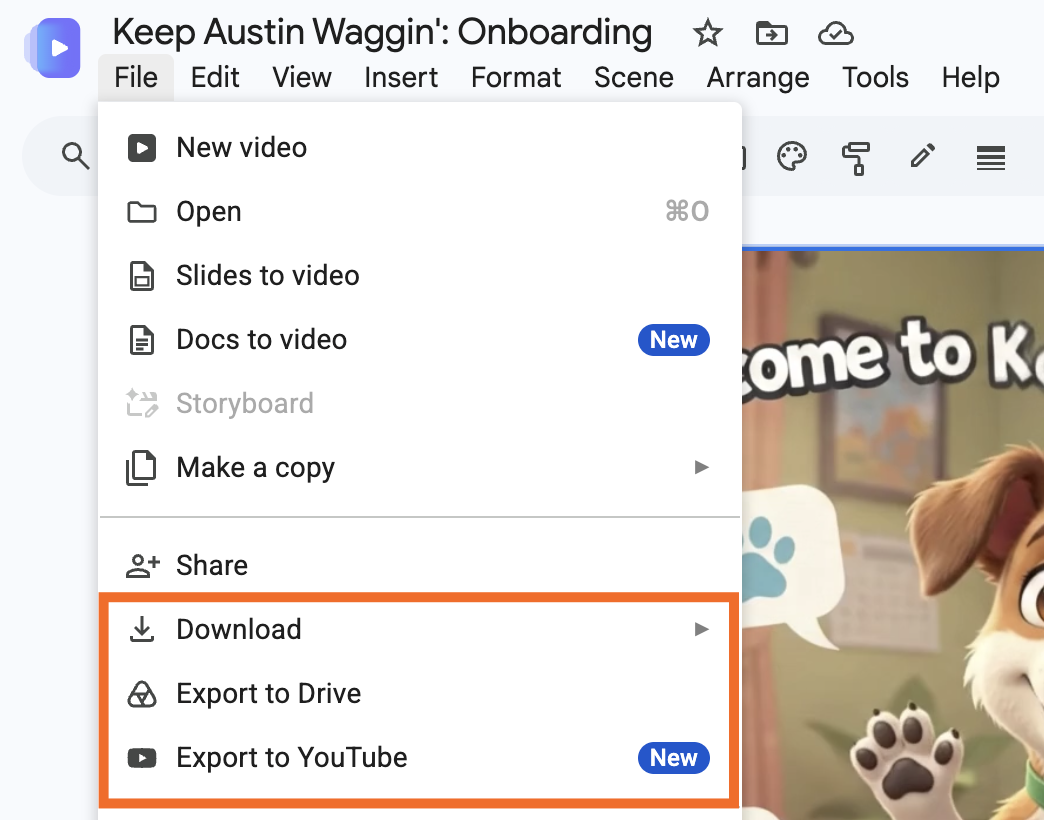
Once you’re happy with your video, share it with an audience. Click File, and then choose from one of the options: Download (and upload it to your media player of choice), Export to Drive, or Export to YouTube.
That’s it for the basics on how to use Google Vids.
Google Vids: Advanced features
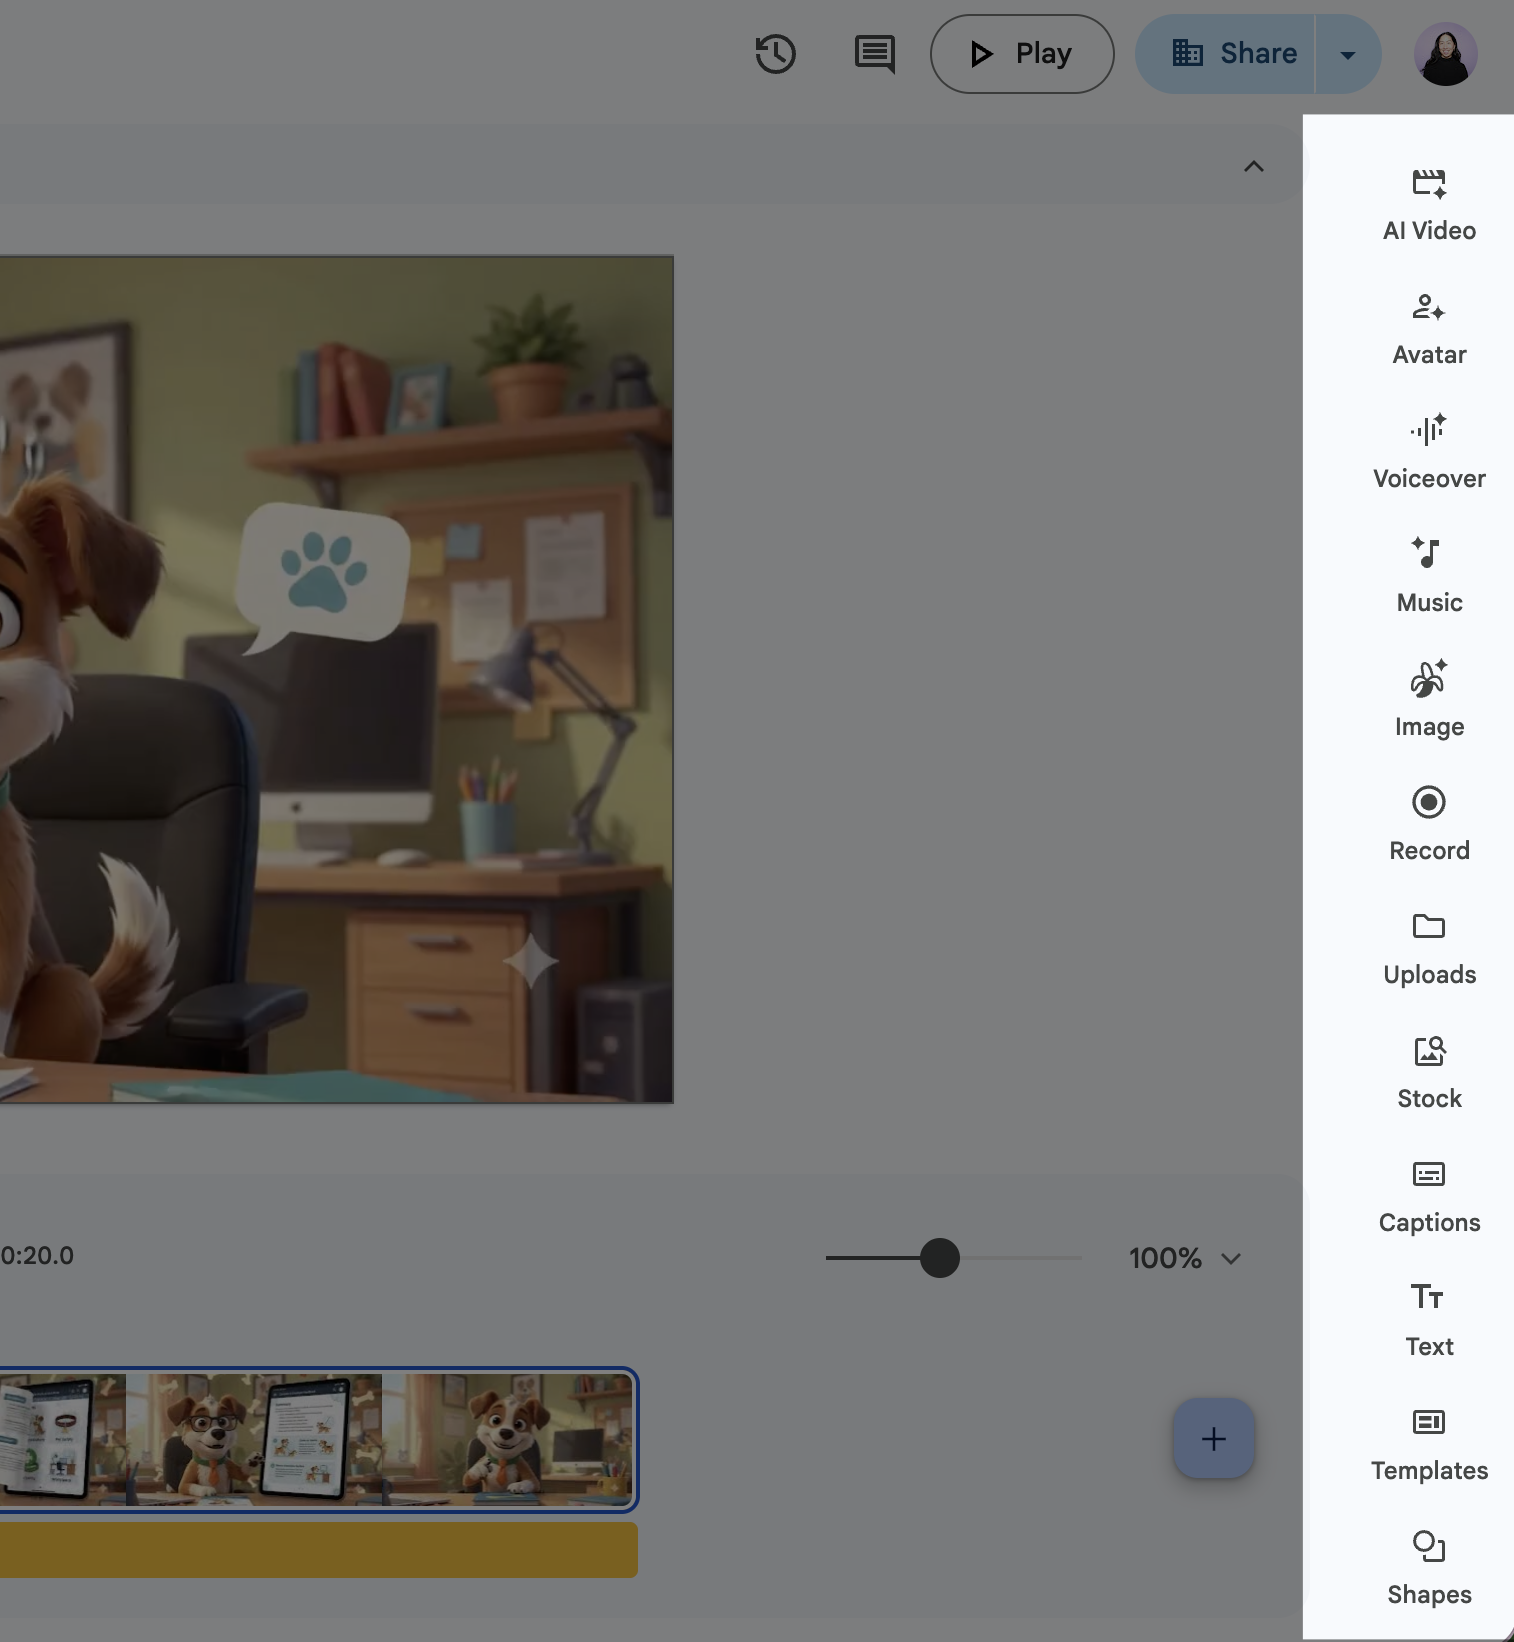
As you can tell, there are a lot of features and editing tools in the app—more than I can cover here. My best suggestion is to click everything to find out which features make the most sense for you to use in your video. Here are the ones I’d start with (you can find these tools in the right-side toolbar).
-
Avatar. If you need a presenter in your video, but you don’t want to be the one on screen, use an AI avatar. You can pick from realistic or cartoon ones, or design your own. Enter a script and watch your avatar come to life (by the time you read this, that might even be a literal statement).
-
Voiceovers. Prefer to keep your audience guessing where the voice is coming from? Google Vids also lets you add audio-only narration to your video. Similar to avatars, all you have to do is enter a script and Vids will handle the AI-generated voiceover.
-
Music. Describe the song you want, including genre, mood, and instruments, and Vids will generate it. You can also add your own lyrics, which is handy when stock music doesn’t match your video’s tone.
-
Captions. If your audience is anything like me, they’re watching your video with the sound off. Vids makes it easy to add captions so everyone can follow along (with or without sound).
And if you’re new to the Vids scene, Google (surprise, surprise) also does a nice job of suggesting other relevant features you can use at any given stage of an edit.
Automate Google apps with Zapier
If you’re making videos in Vids, there’s a good chance the rest of your workflow lives in Google, too. Zapier connects Google apps—and everything else in your stack—so those pieces stop living in separate tabs and start working together.
Build the connection however you already work: in Zapier’s visual editor, in code, or by describing what you want to the AI assistant you already use (Gemini included). However you start, it becomes a workflow that runs on Zapier across 9,000+ apps. Learn more about how to automate Google apps.
Build automations from wherever you work. Describe the outcome you want, and Zapier connects your tools, runs the steps, and stays on the job after you close the chat. Combine AI with reliable, deterministic automation across 9,000+ apps. Get started for free.
Google Vids: FAQ
If you’re wondering what else Google Vids can do, check out the answers to these commonly asked questions.
What AI model does Google Vids use?
As of this writing, Google uses a combo of models to power Google Vids:
-
Gemini handles the AI chatbot-esque side of things—for example, writing and editing scripts and generating voice-over text.
-
Omni 1.1 Flash generates the actual video.
-
Lyria generates the audio.
How long can a Google Vids video be?
Videos made in Vids can be up to 30 minutes long. If you’re importing videos into Google Vids to edit, they can be up to 95 minutes or 4GB (but you’ll have to trim it down to 30 minutes or less).
Do AI videos from Google Vids have a watermark?
Yes. Every AI-generated video or clip has an embedded watermark, but it isn’t visible when you watch the video. They’re there primarily to help verification tools identify AI-generated content.
Is Google Vids available on mobile?
You can view Google Vids files on mobile, but you can only create and edit videos on the web app.
Does Google Vids work offline?
You can’t create or edit a Google Vids file offline. But you can export your video as an MP4 file and edit it offline using another video editing software.
Related reading:
This article was originally published in March 2025 by Nadira Bostic. The most recent update was in October 2026.
Get productivity tips delivered straight to your inbox
We’ll email you 1-3 times per week—and never share your information.
Related articles




Improve your productivity automatically. Use Zapier to get your apps working together.