By Jessica Lau · October 13, 2026

My toxic trait is forcing my friends and family into having PowerPoint parties—which are really just an excuse for me to do a full-blown slideshow on why Samwise Gamgee is the best character in the Lord of the Rings trilogy. If you haven’t been roped into a PowerPoint party yet, trust me, it’s around the corner.
I can’t come up with a topic for you, but I can definitely help you with the whole creating a PowerPoint part. Even if you just need to use PowerPoint for work (which, while much less fun, is probably more likely), here’s everything you need to know about how to use PowerPoint.
Table of contents:
What is PowerPoint?
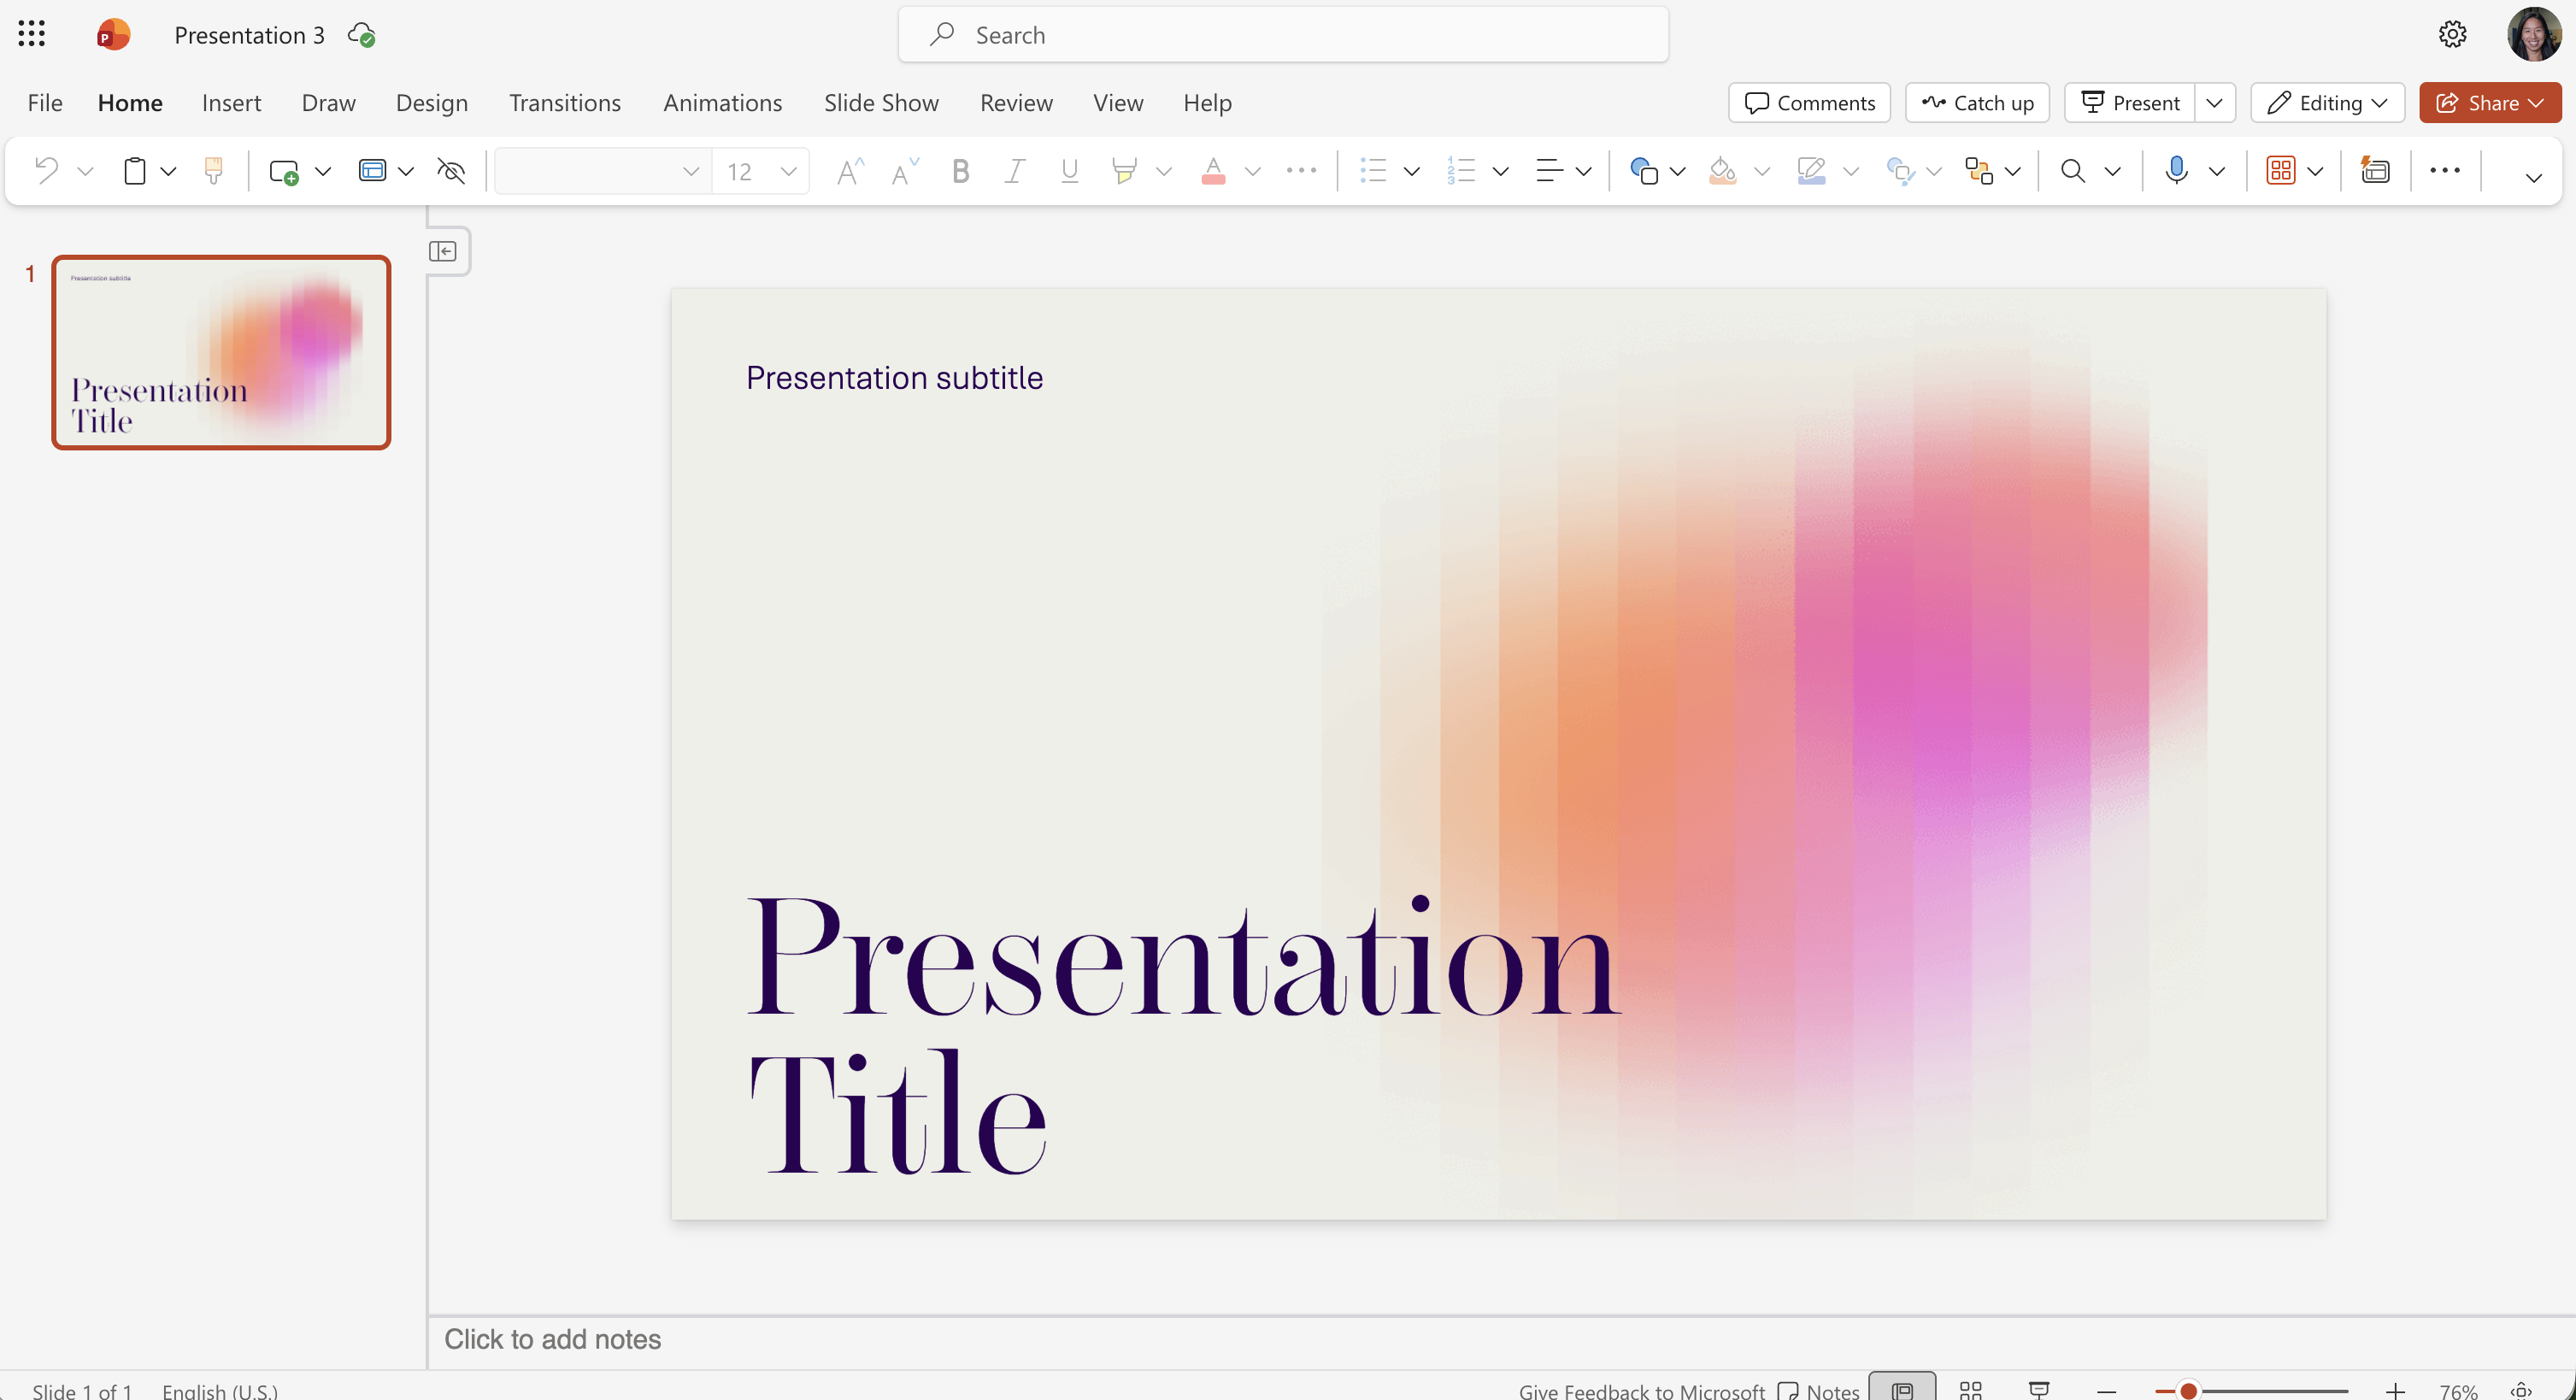
Microsoft PowerPoint is a popular presentation app that lets users create slides from a template or from scratch, adding images, videos, transitions, and animations.
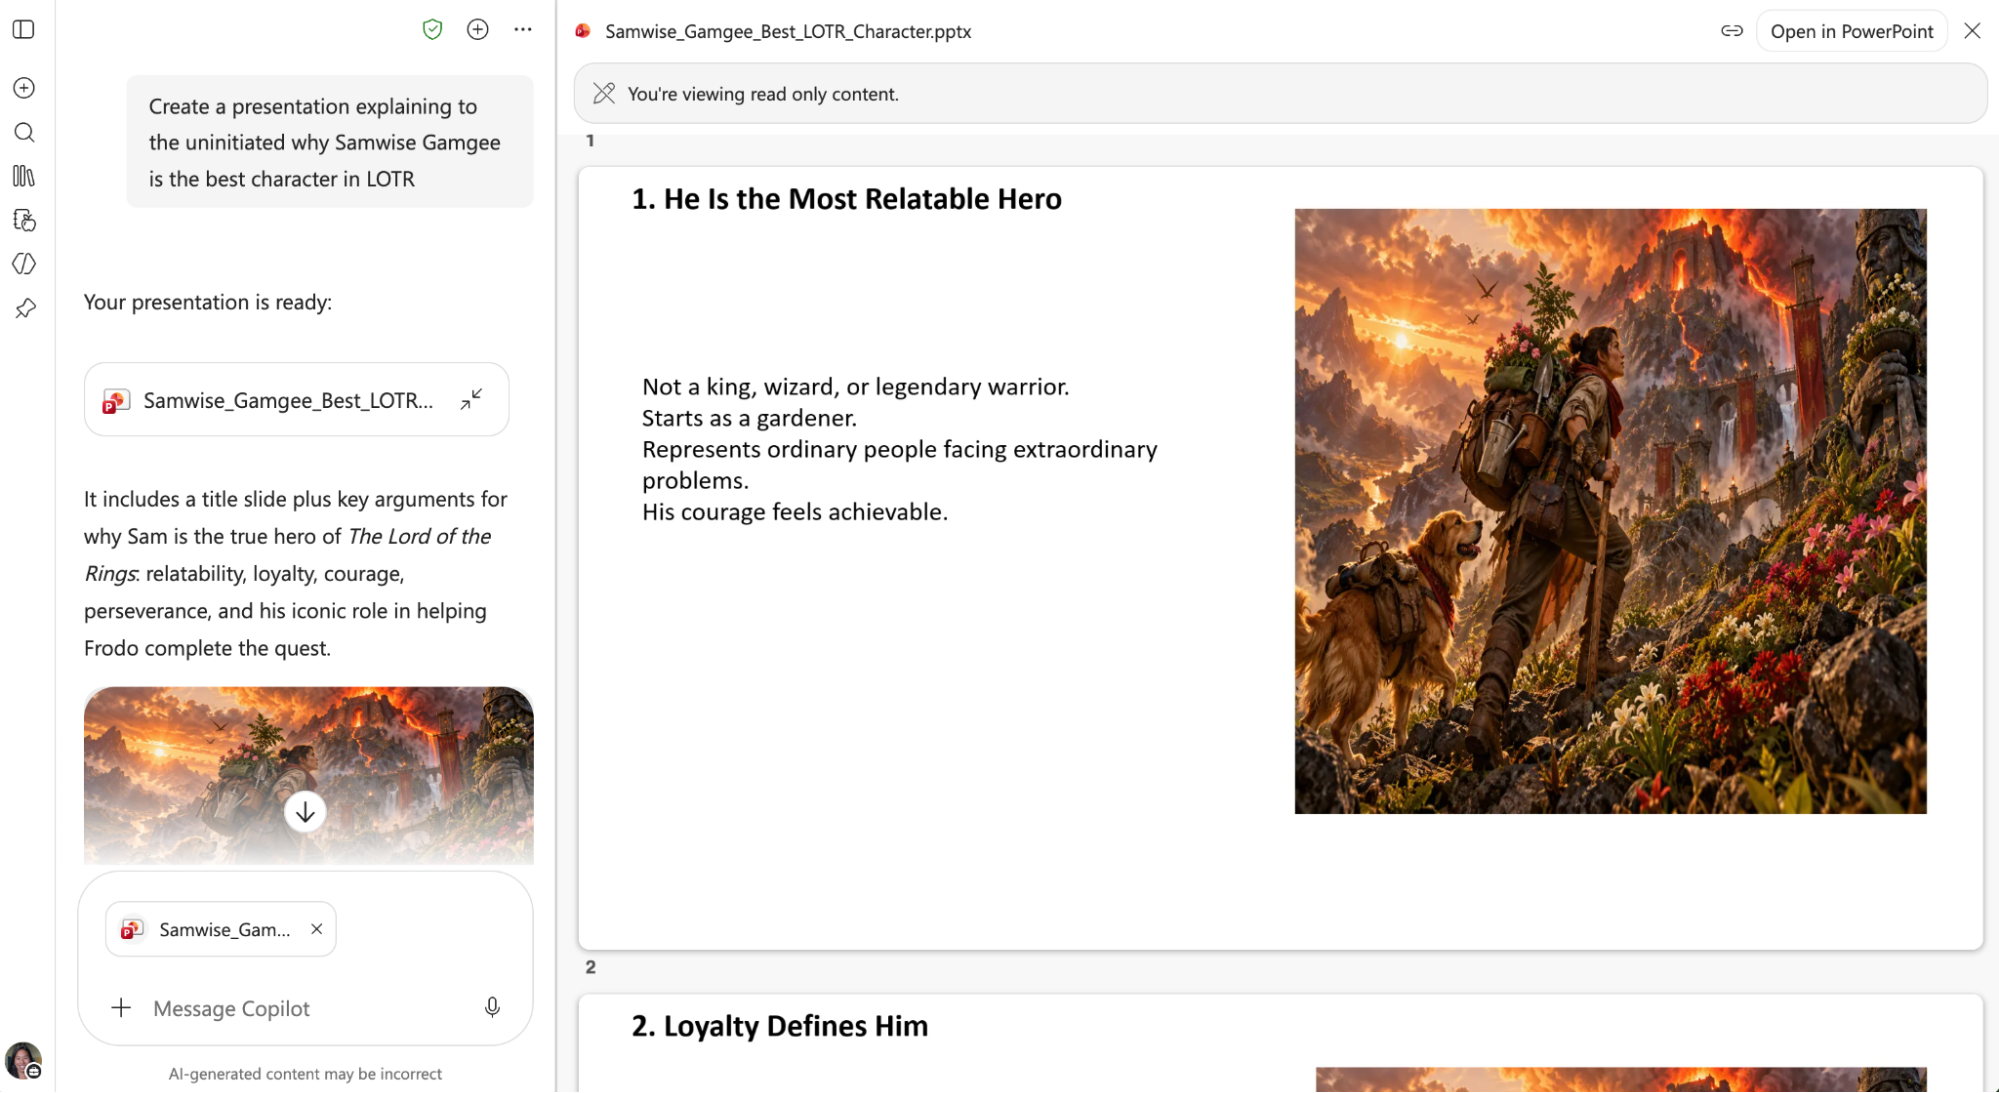
And we are firmly in the let-the-robots-handle-it era, so yes—you can use Microsoft’s built-in AI assistant, Copilot, to create and edit the presentation for you.
Fair warning: If you’re creating an image-heavy presentation with images of real people, characters, or places, you’re better off inserting those manually. Copilot’s still got some accuracy work to do in that area (maybe a good thing given copyright issues). My AI-generated Samwise came out as a woman on a nature walk with her golden retriever, which is the type of creative license that would bring the wrath of the Tolkien estate down on me faster than I could say “second breakfast.”
How much is PowerPoint?
If you have a paid Microsoft 365 subscription or you’ve bought a one-time version like PowerPoint 2024, you can use the desktop app. But anyone can use PowerPoint for the web (formerly “PowerPoint Online”)—which has a few key differences—for free.
What is PowerPoint used for?
PowerPoint can be used for anything from traditional meeting presentations to school reports and recreational nerd-outs (see: PowerPoint parties).
Here are a handful of ways you can use PowerPoint:
-
Giving slide presentations
-
Creating basic animations and infographics
-
Creating digital portfolios
-
Displaying looping information on monitors or kiosks
How to use PowerPoint
If you’ve ever used other Microsoft tools like Word or Excel, PowerPoint’s layout will feel familiar. It includes several tabs across the top of your screen, each offering plenty of ways to add, edit, and collaborate on content with your team.
Once you create a new PowerPoint, there are all sorts of ways to add and edit content. Feel free to jump around if you just need a refresher on how to use certain tools, or keep scrolling for a step-by-step guide.
How to create a PowerPoint
First, log in to Microsoft 365 or Copilot—they’ll take you to the same starting point. It’ll automatically open a new Copilot chat window. From there, you have a few options:
-
Build manually from Copilot. In the side panel, click Apps and more (it looks like a 3×3 dot grid), and select PowerPoint.
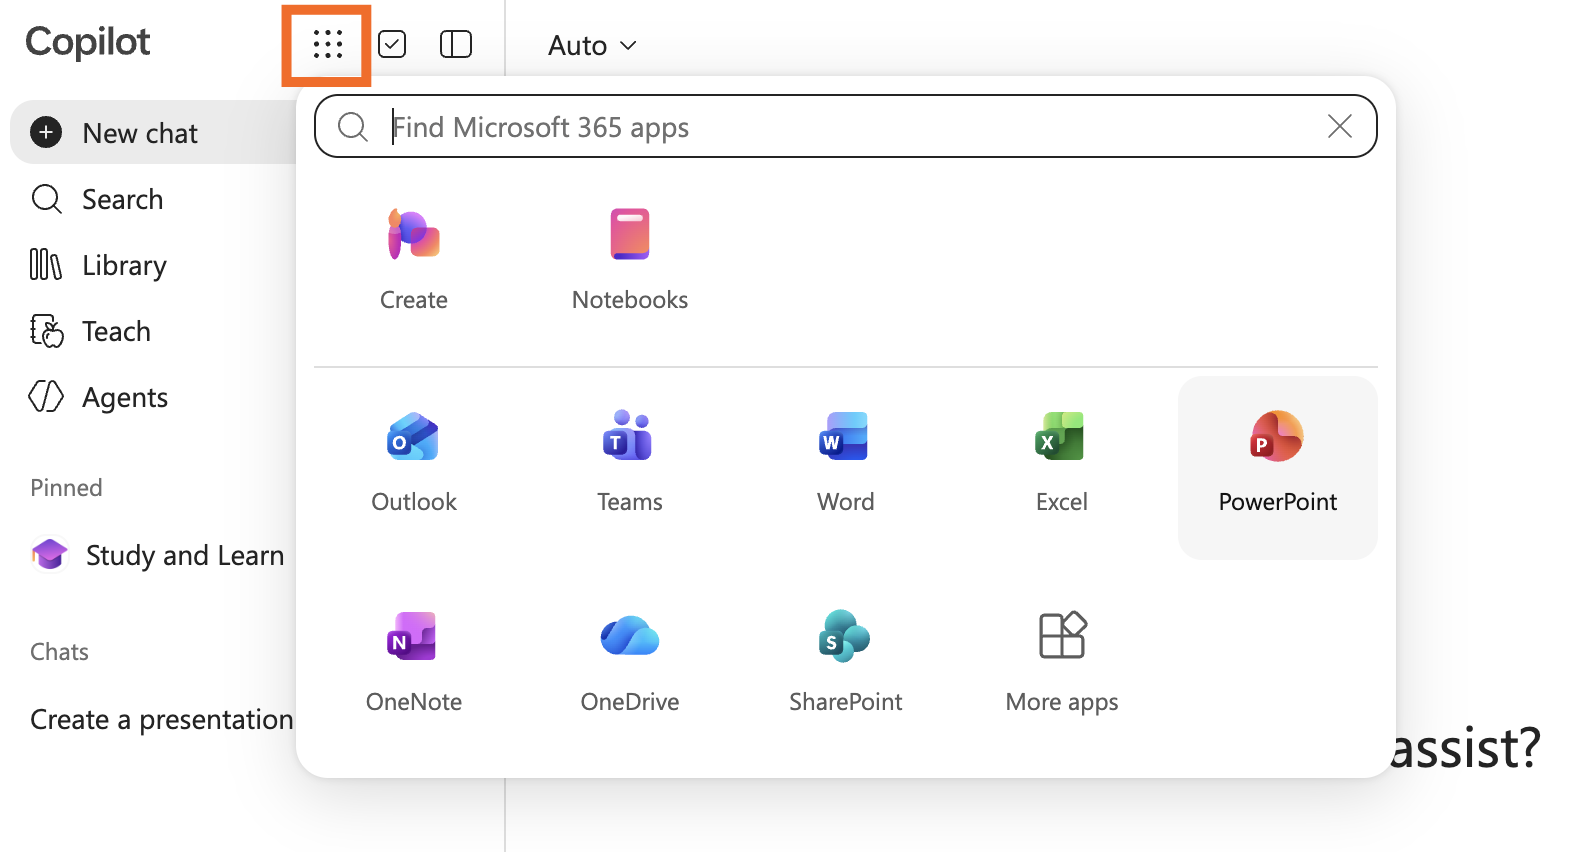
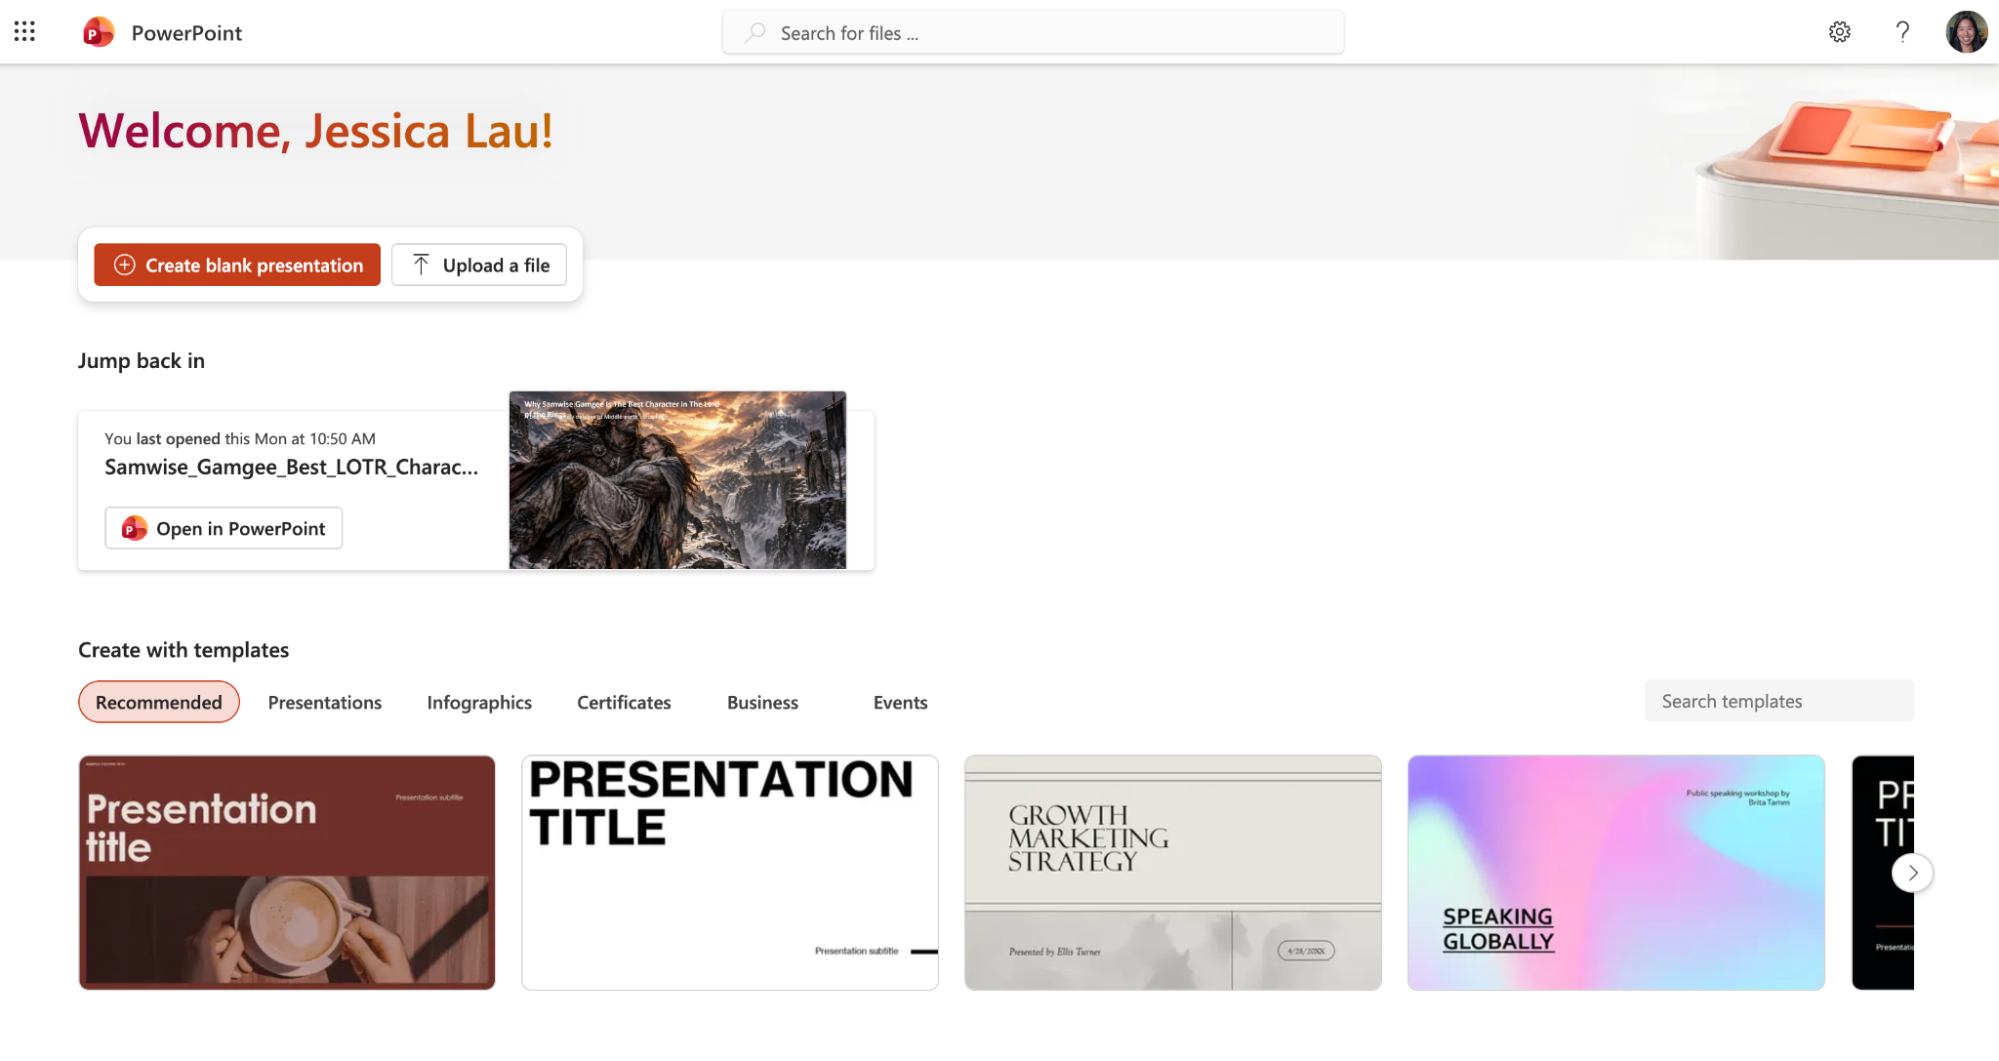
Then click Create blank presentation or select one of the premade templates to jumpstart your build.
-
Use Copilot to create a deck. In the prompt box, describe the presentation you want to build (even just the topic will do) and let Copilot take care of the rest.
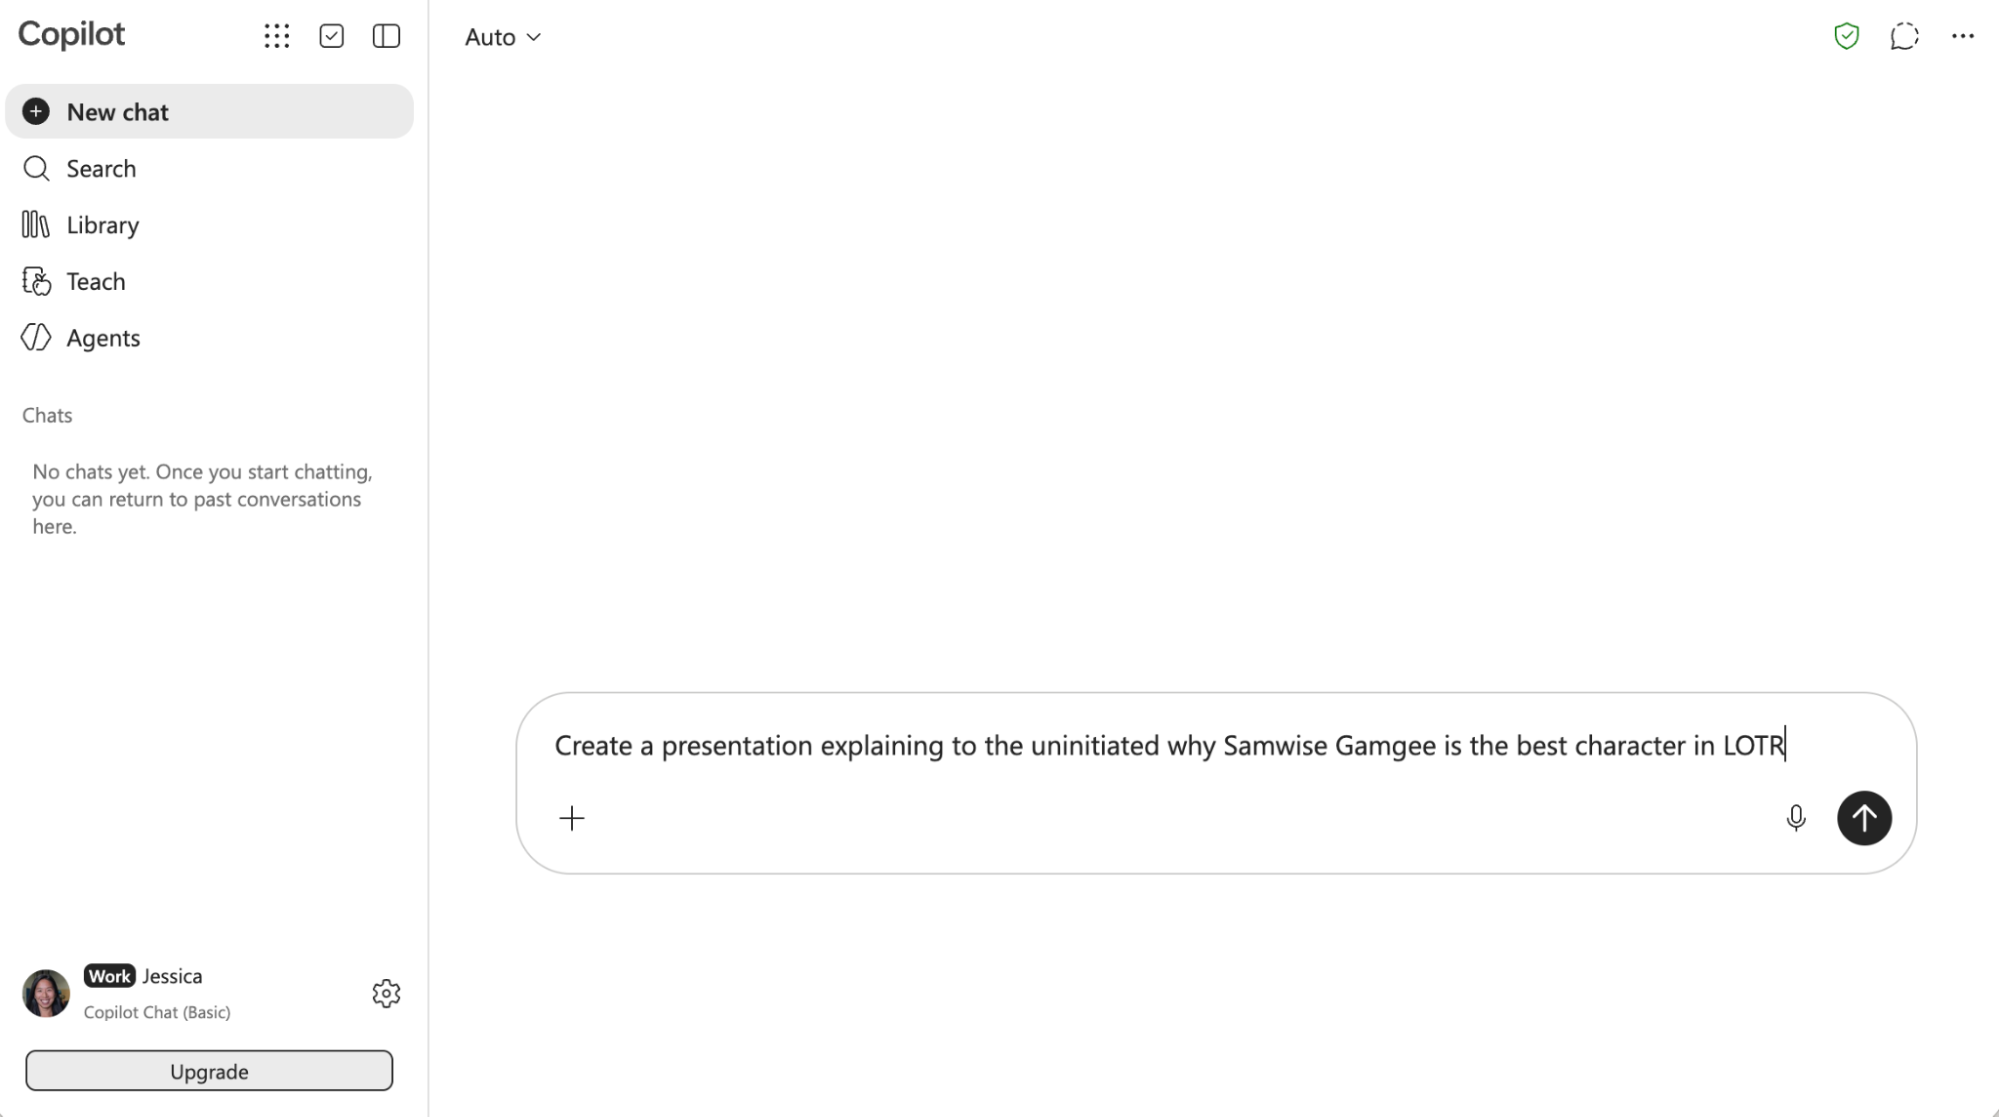
Alternatively, you can go directly to PowerPoint for the web—it’ll save you a click or two. The remaining steps for editing your presentation are the same.
How to add a slide in PowerPoint
There are two ways to add a slide in PowerPoint:
-
From the ribbon. Click Insert, and select New Slide to add a blank slide or click the down caret (
⋁) next to it and select a slide style.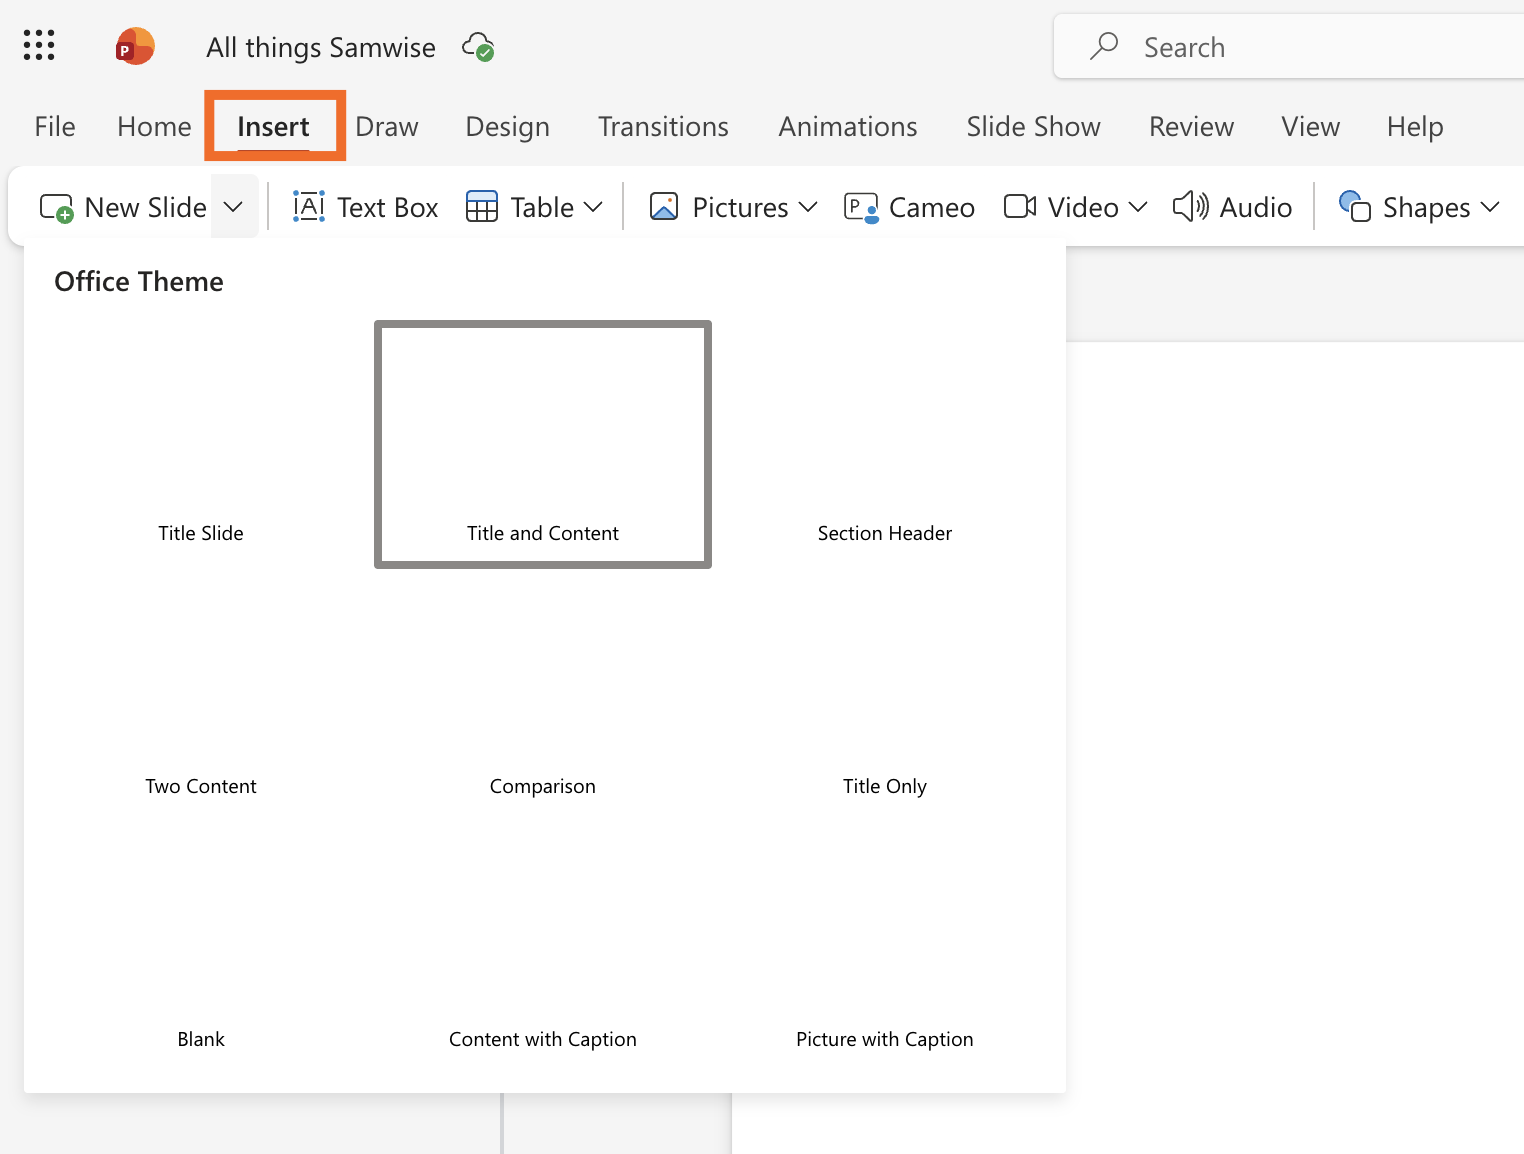
-
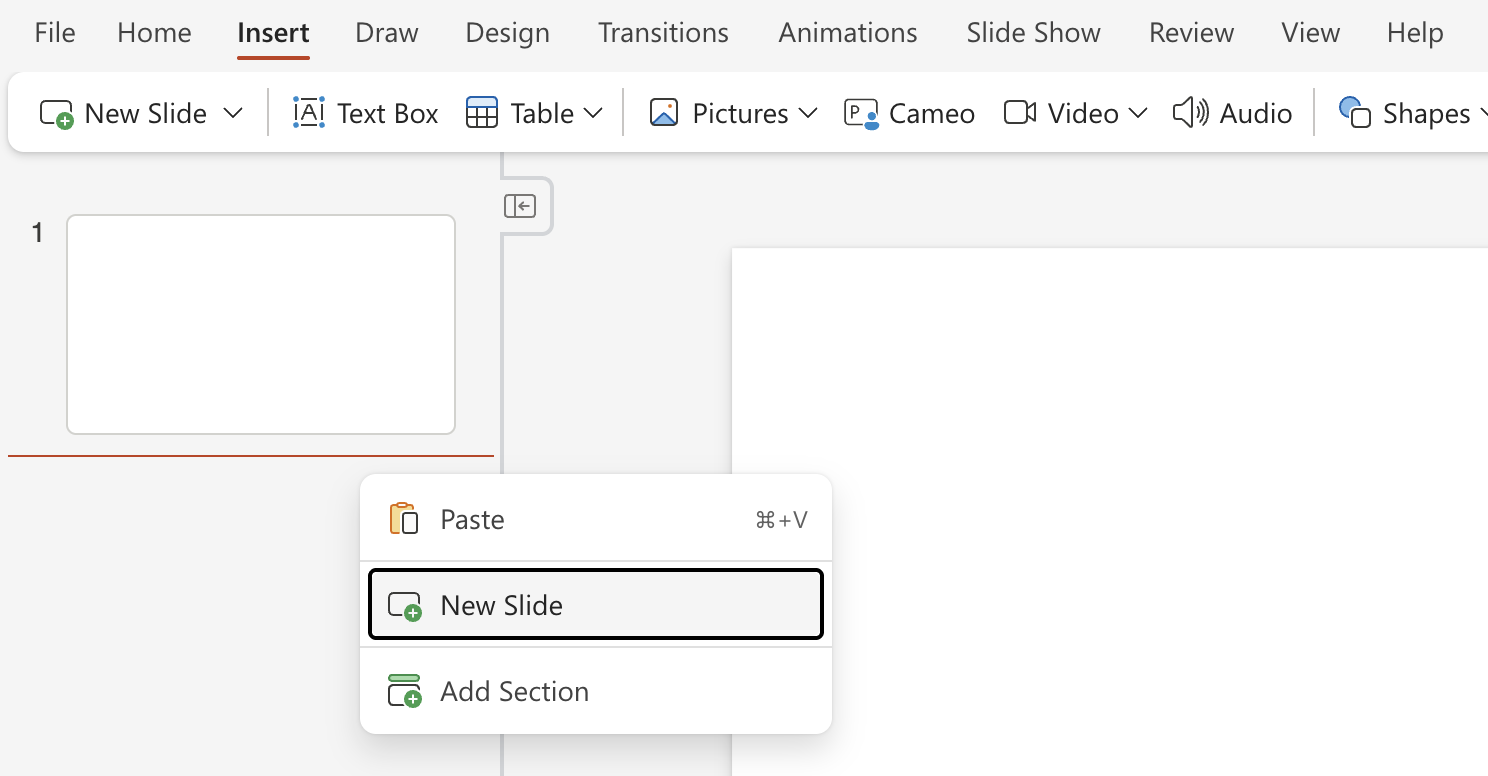
From the side panel. Right-click anywhere in the side panel, and select New Slide.
How to add a text box in PowerPoint
Once you’ve added slides, it’s time to fill them with content. Here’s how to add text to your slides (the process is similar for adding images, videos, and other art).
-
Click Insert in the ribbon, and select Text Box.
-
Click anywhere on your slide and drag to create a text box (the exact dimensions don’t matter since you can adjust them after).
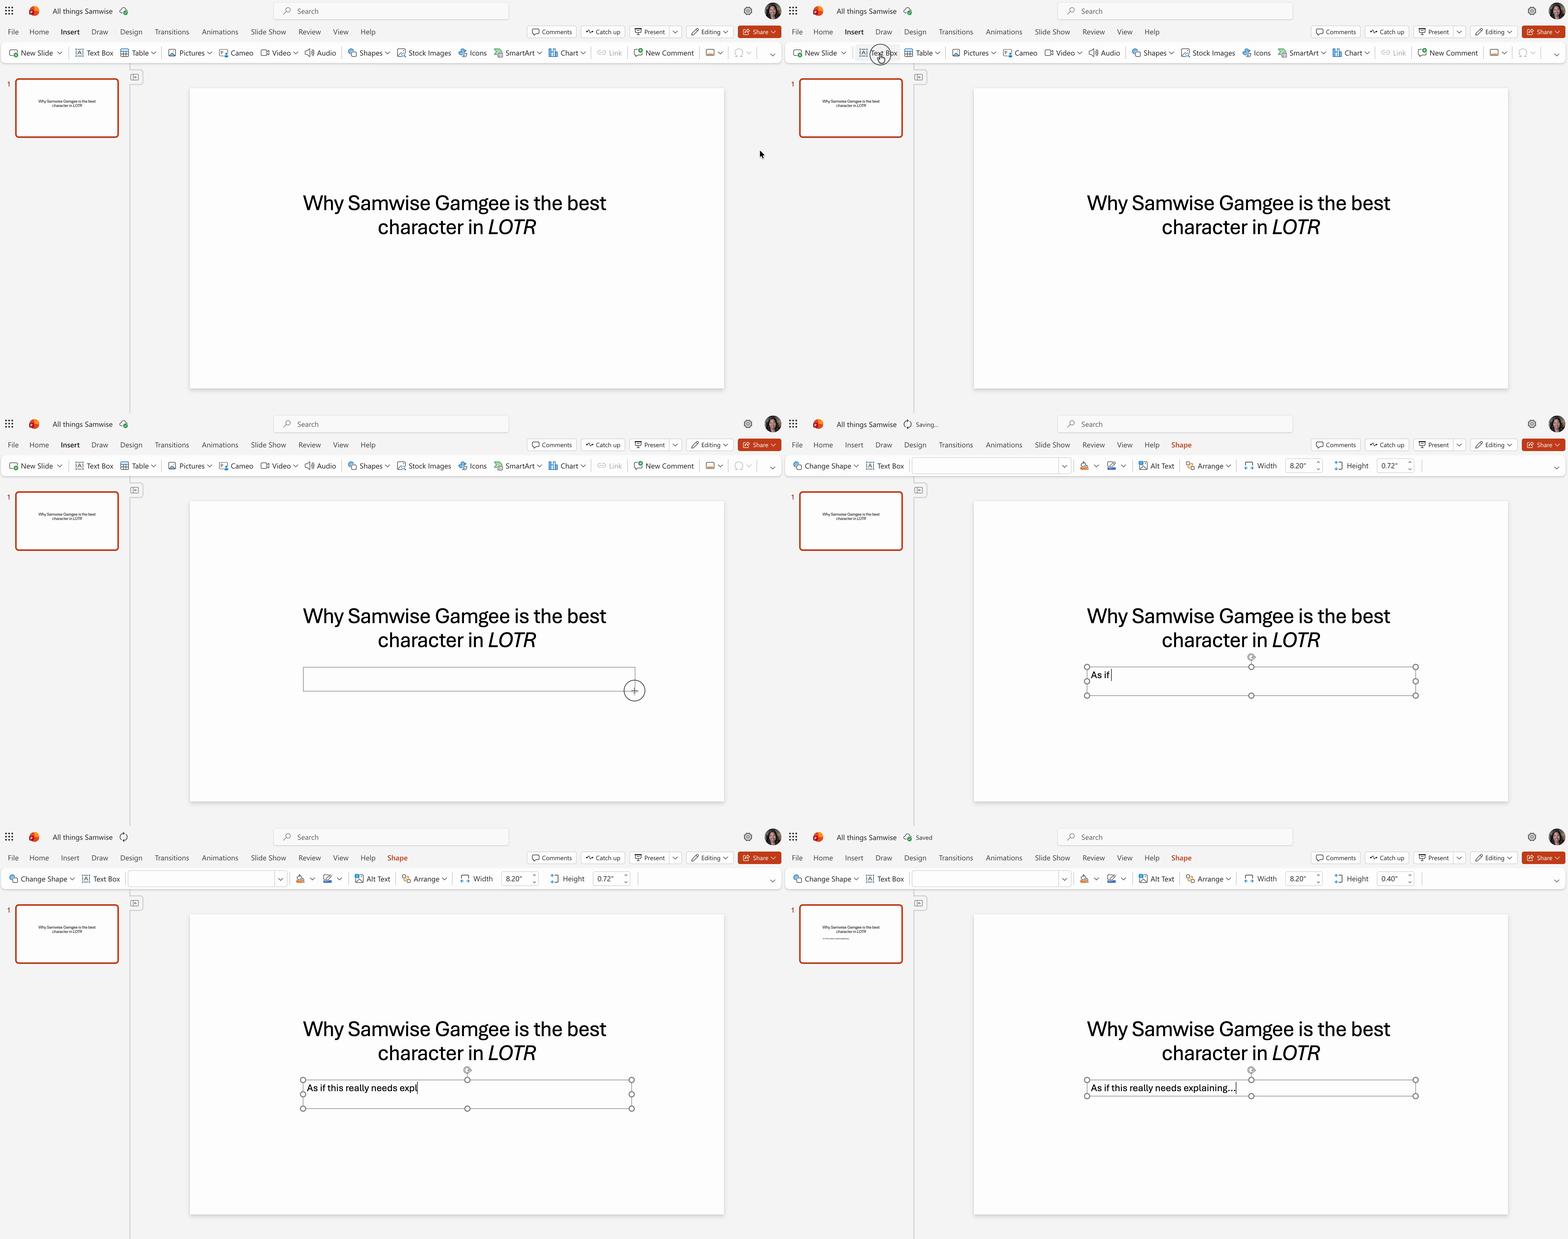
To reposition the text box, click it and hover over any of the borders. Once your cursor turns into a four-way arrow, drag and drop the box wherever you want it.
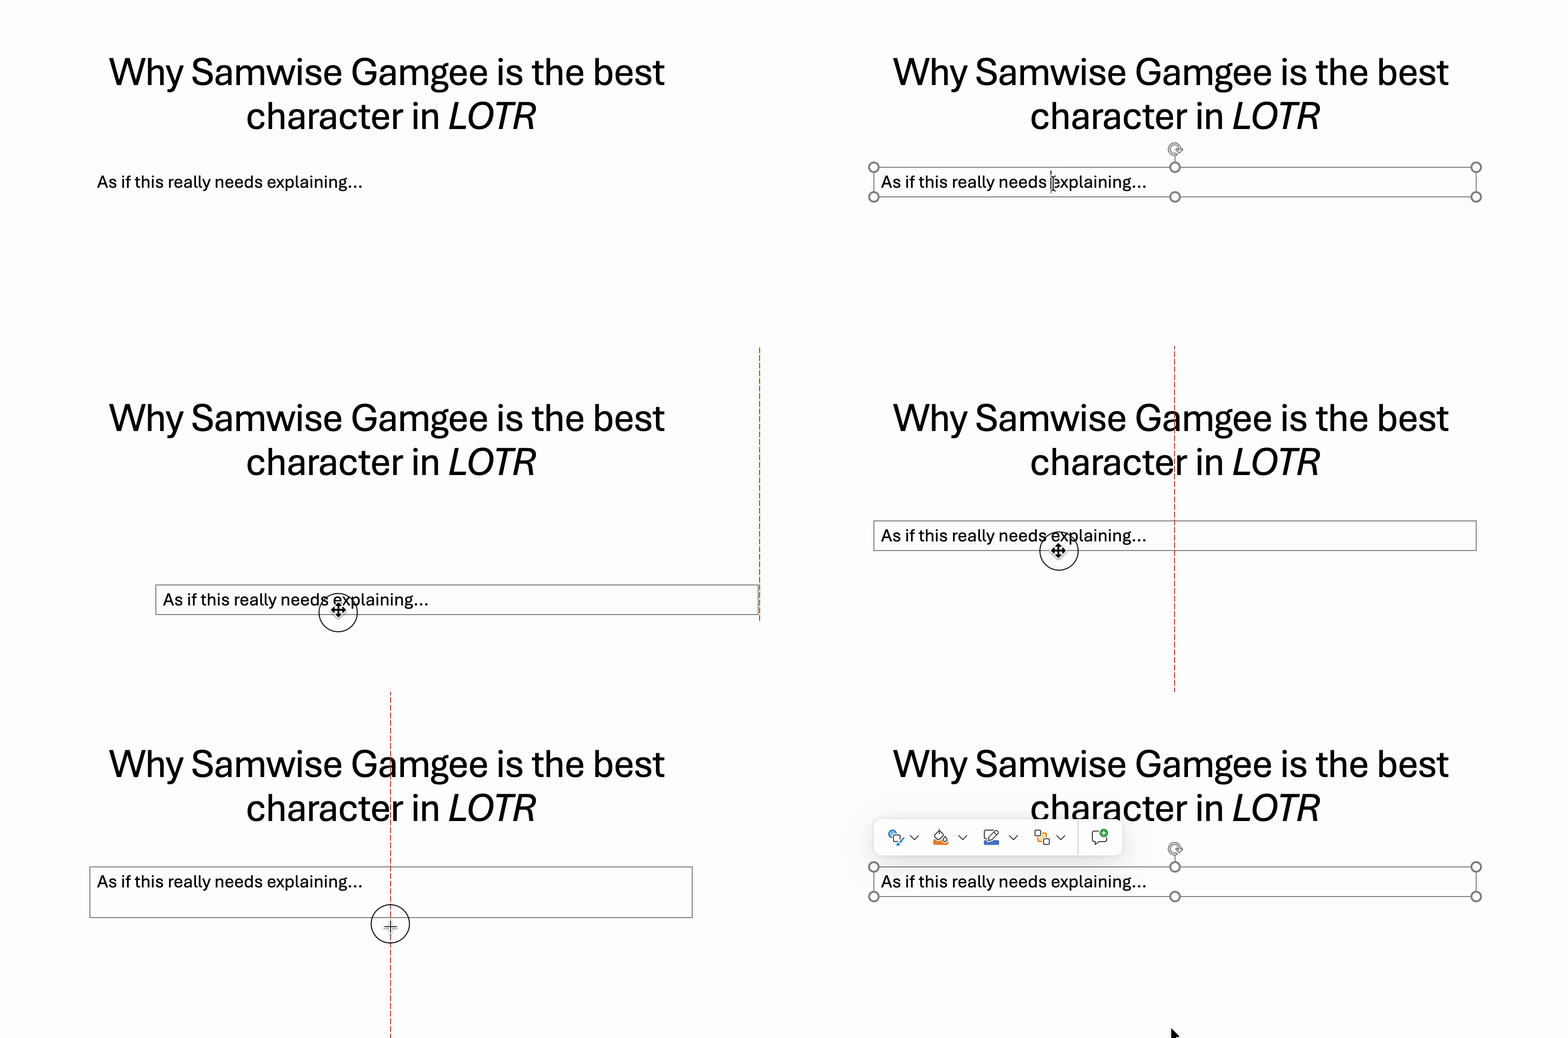
You can also technically adjust the size of the text box. Click the text, and then drag and expand any of the dots along its border. It works fine for expanding the width of your box, but if you try to expand the height, PowerPoint automatically readjusts the box to fit the height of the existing text. So if your text runs across only one line, the box bounces back to be tall enough for that one line (as shown in the demo above). If it runs across two, it’ll automatically expand to fit the height of two lines.
How to add transitions in PowerPoint
Why stick with a simple click from one slide to the next when you can razzle dazzle your audience with a gust of wind blowing in your slides? Or perhaps a literal pulling-back-the-curtains-type reveal?
-
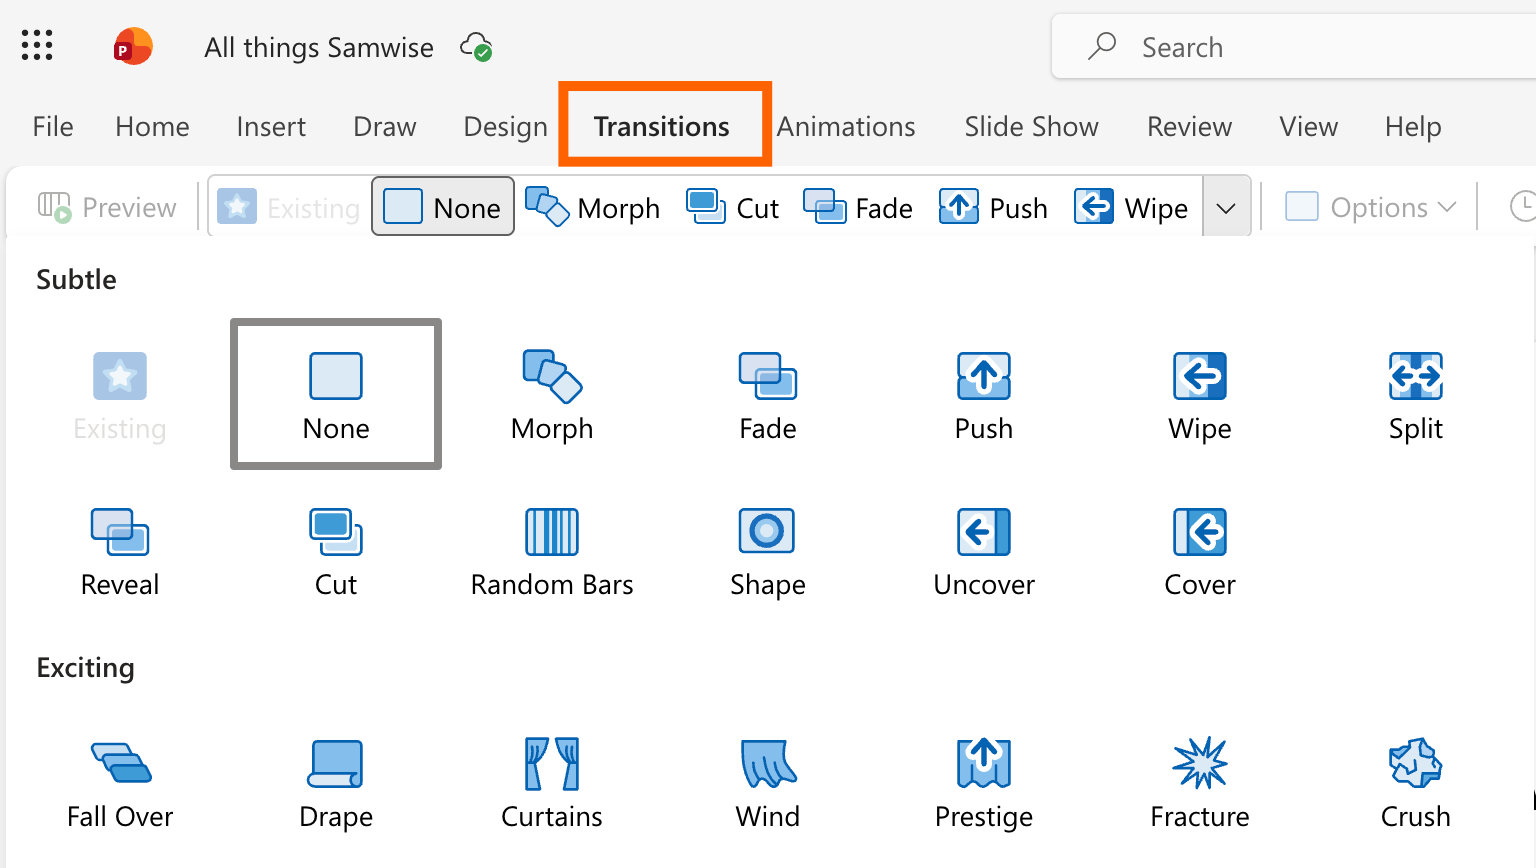
Click the slide you want to modify the transition on, and select Transitions in the ribbon.
-
Choose any transition. You can also click the dropdown next to the transition icons for some more exciting options (as deemed by PowerPoint).
-
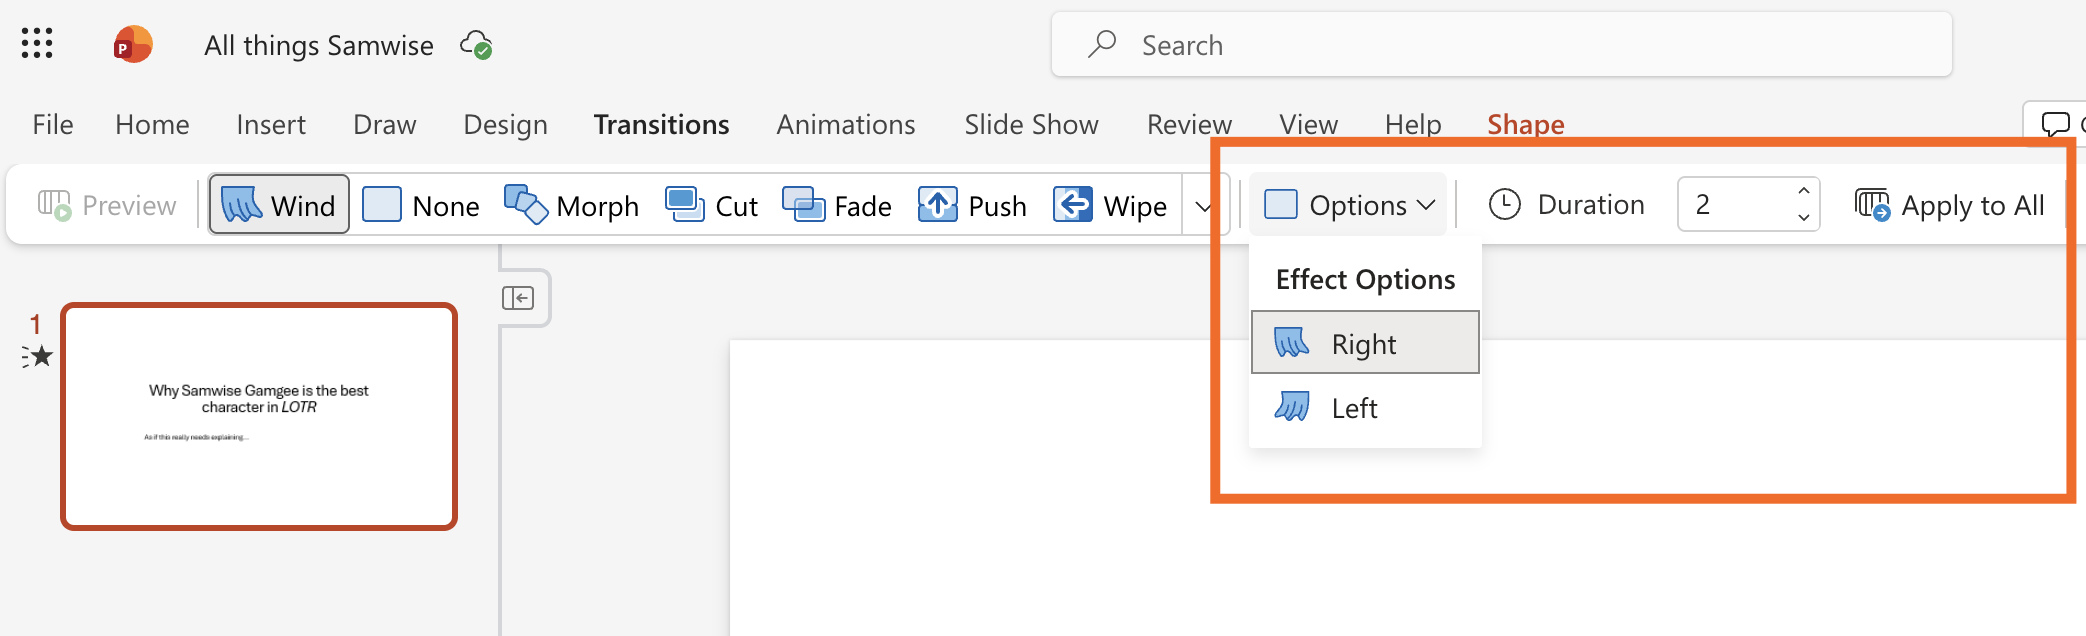
Select the duration of the transition (how long it takes to go from one slide to the next). Depending on your transition, you may be able to modify other elements—for example, Wind lets you choose which direction the slide blows in/out from.
-
Optionally, click Apply to all to use the same transition settings for all your slides.
Changed your mind and want to return to the simple life? Click Transitions, and select None.
How to add animations in PowerPoint
If you want to add even more pizzazz to your slides, animate your slide content. That includes text boxes, images, charts, or anything else on your slide.
-
Select the slide element that you want to animate.
-
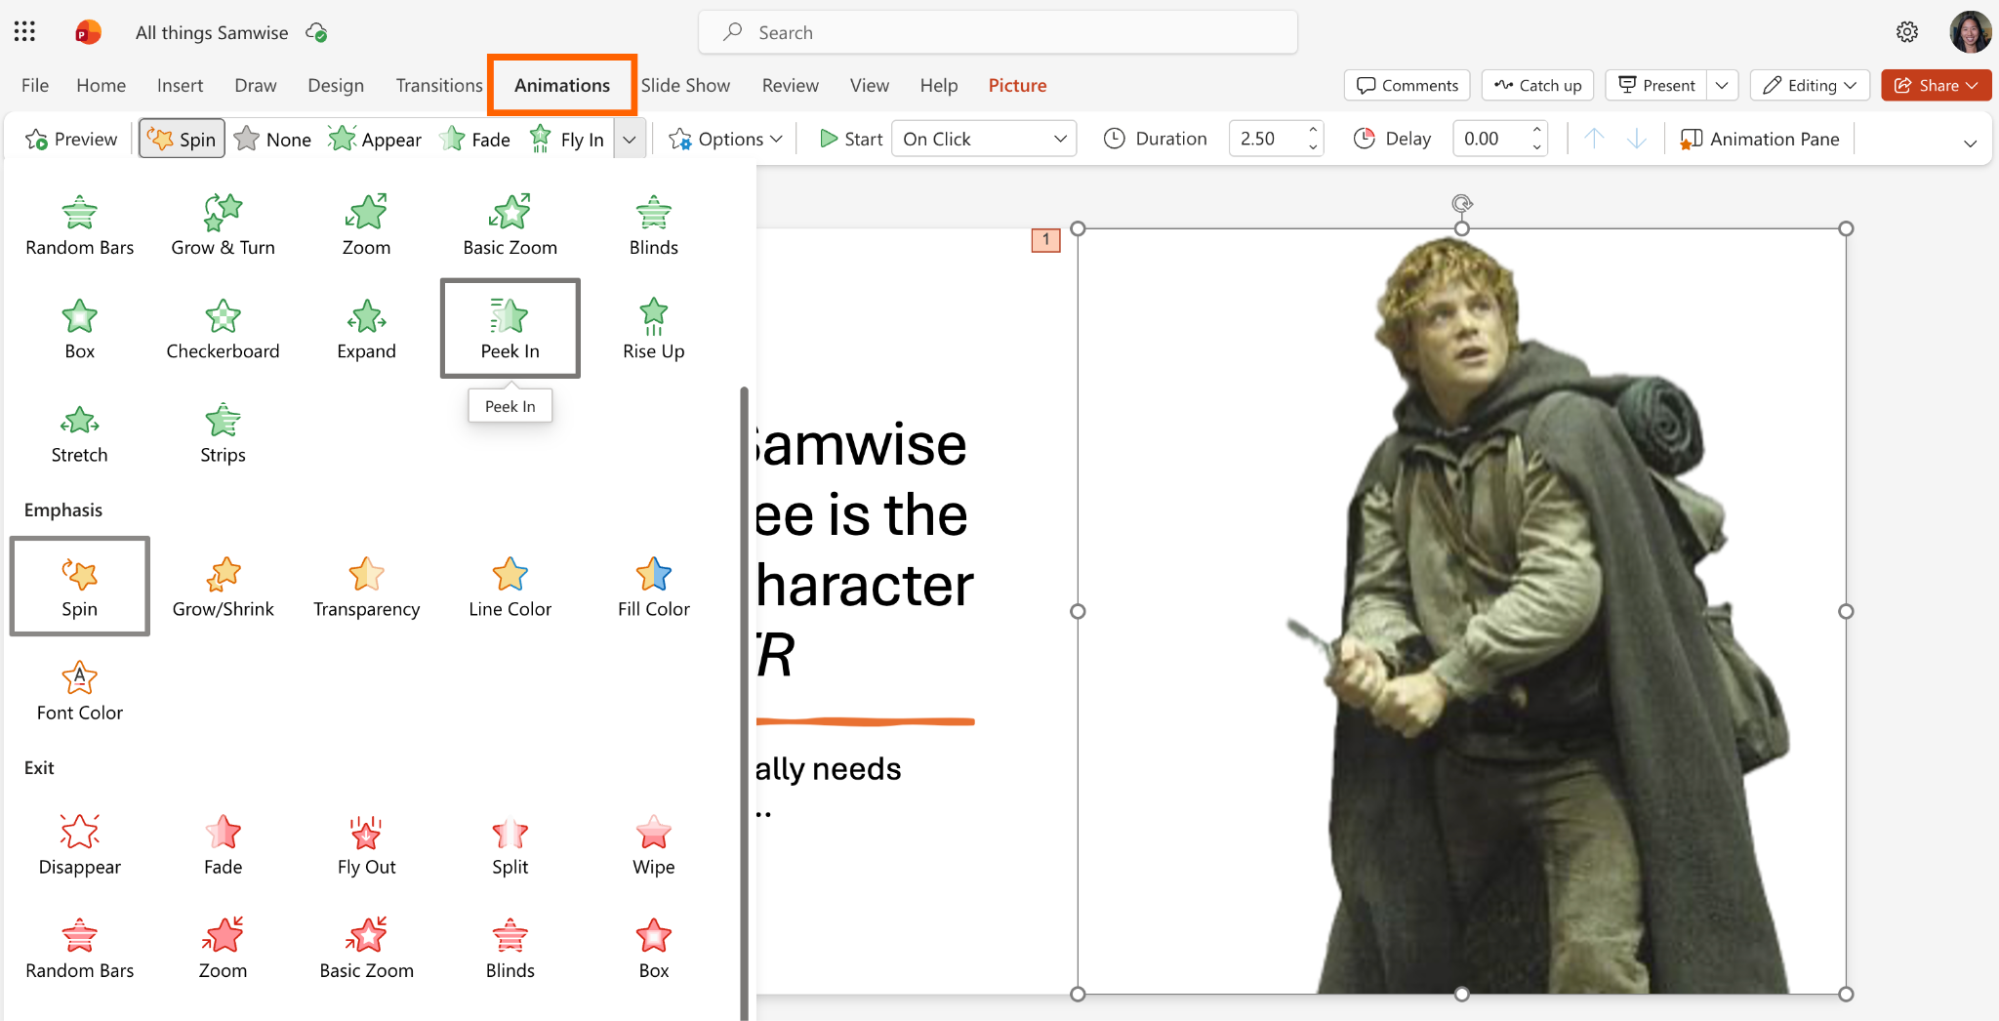
Click Animations in the ribbon, and choose your effect (click the dropdown for more options).
-
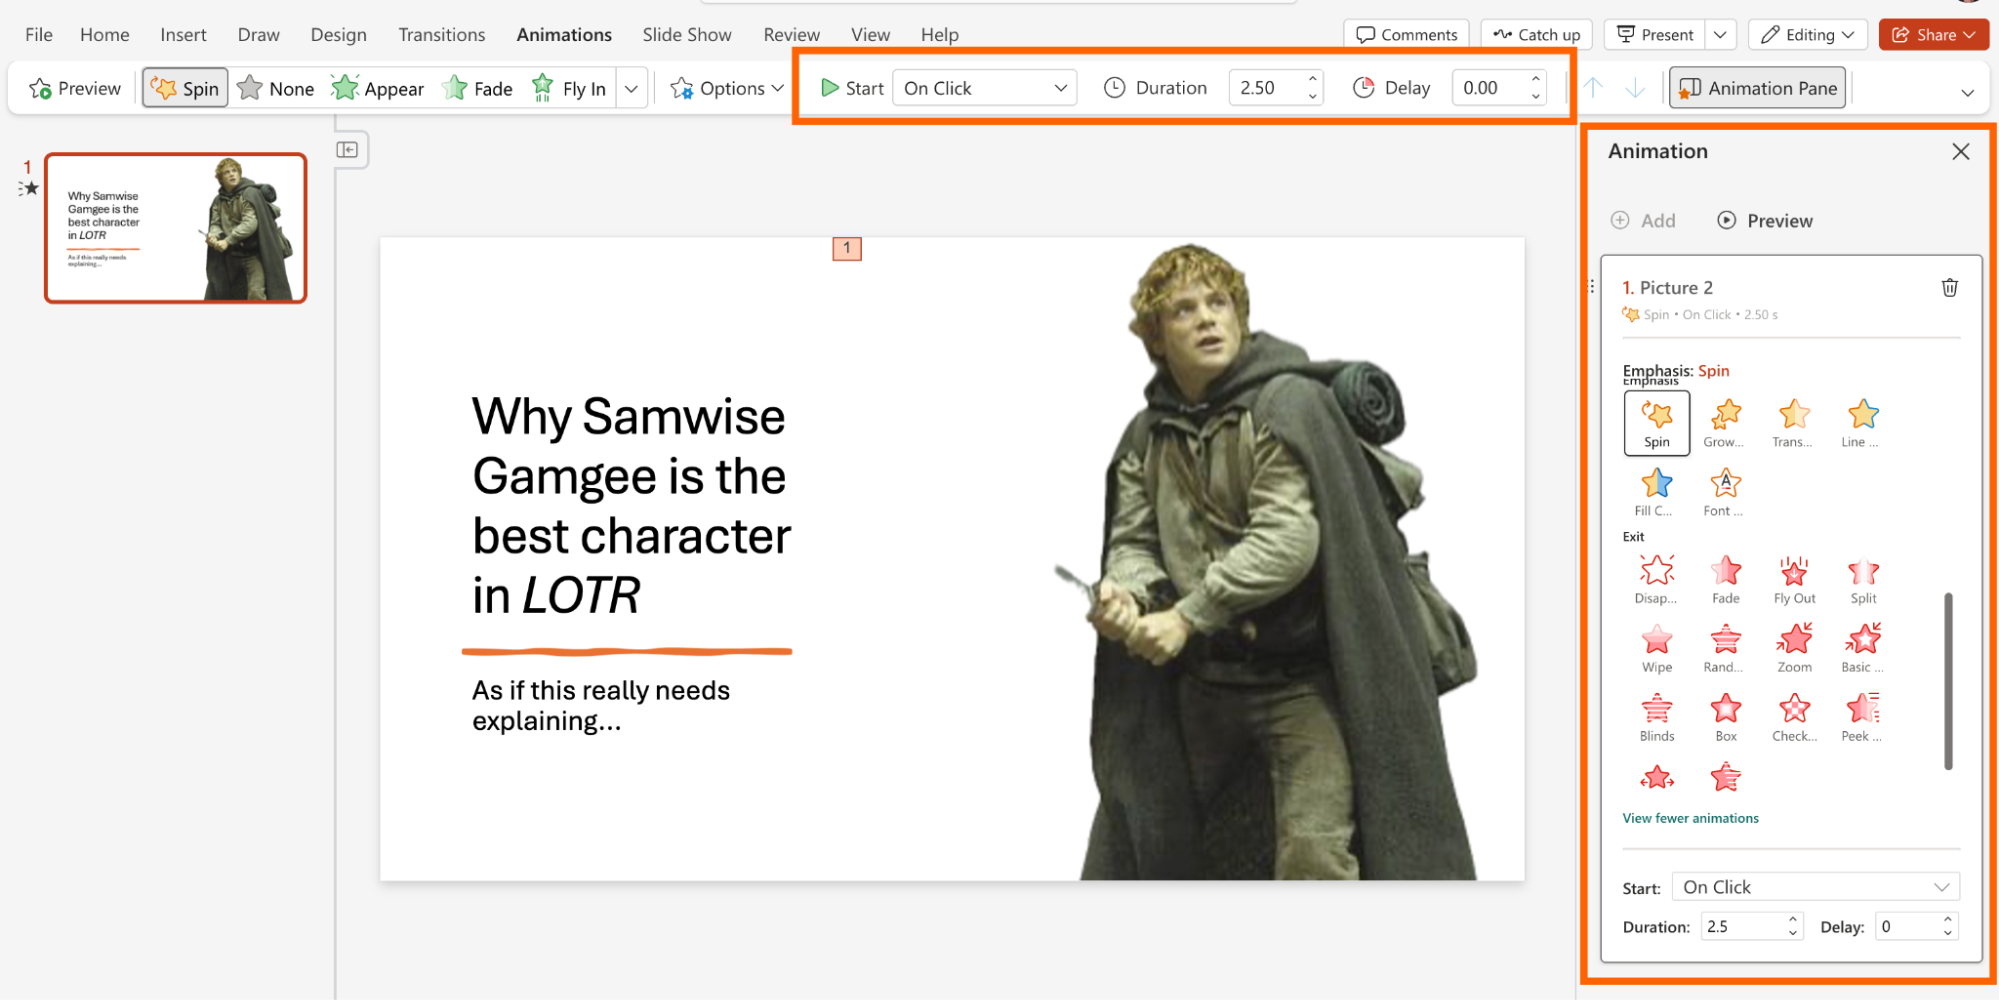
In the ribbon or the Animation pane that appears, you can modify when the animation plays (automatically or on click) and for how long.
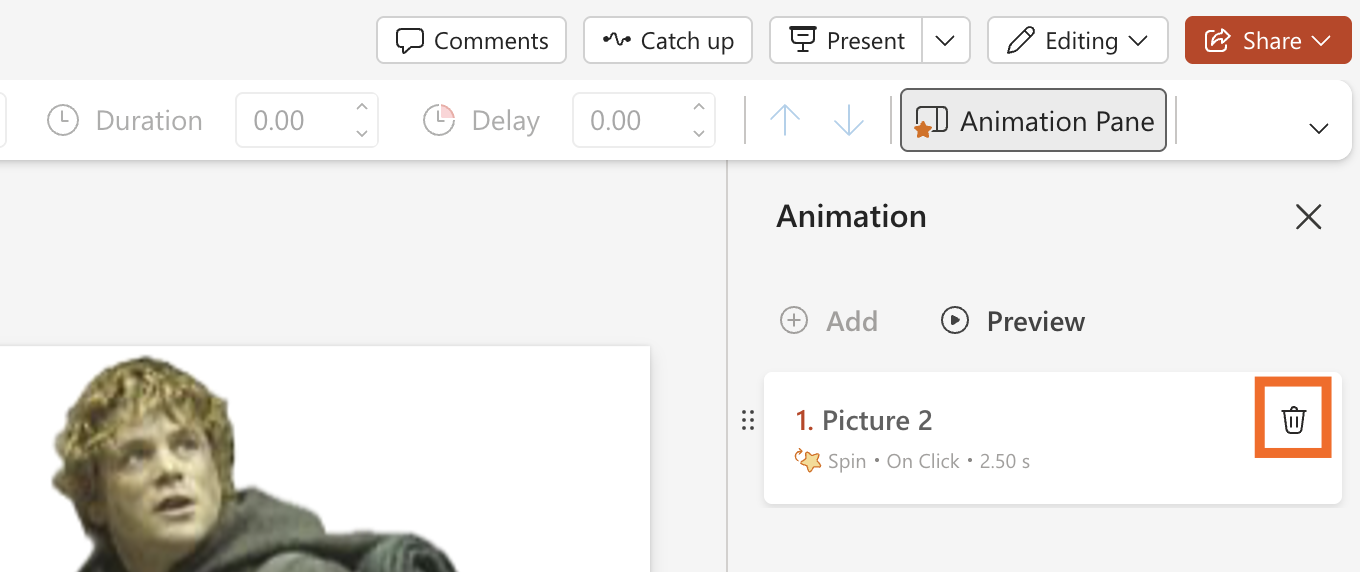
To delete an animation, select the animated element. In the Animation pane, click the garbage can next to your selected element.
How to add presenter notes in PowerPoint
The best slides are simple and uncluttered—but if you’re giving a presentation, odds are good that you need more in-depth notes than the few bullet points on the screen. That’s where presenter notes come in.
Click Notes at the bottom of your screen (next to the zoom controls), and then enter your talking points in the Notes section.
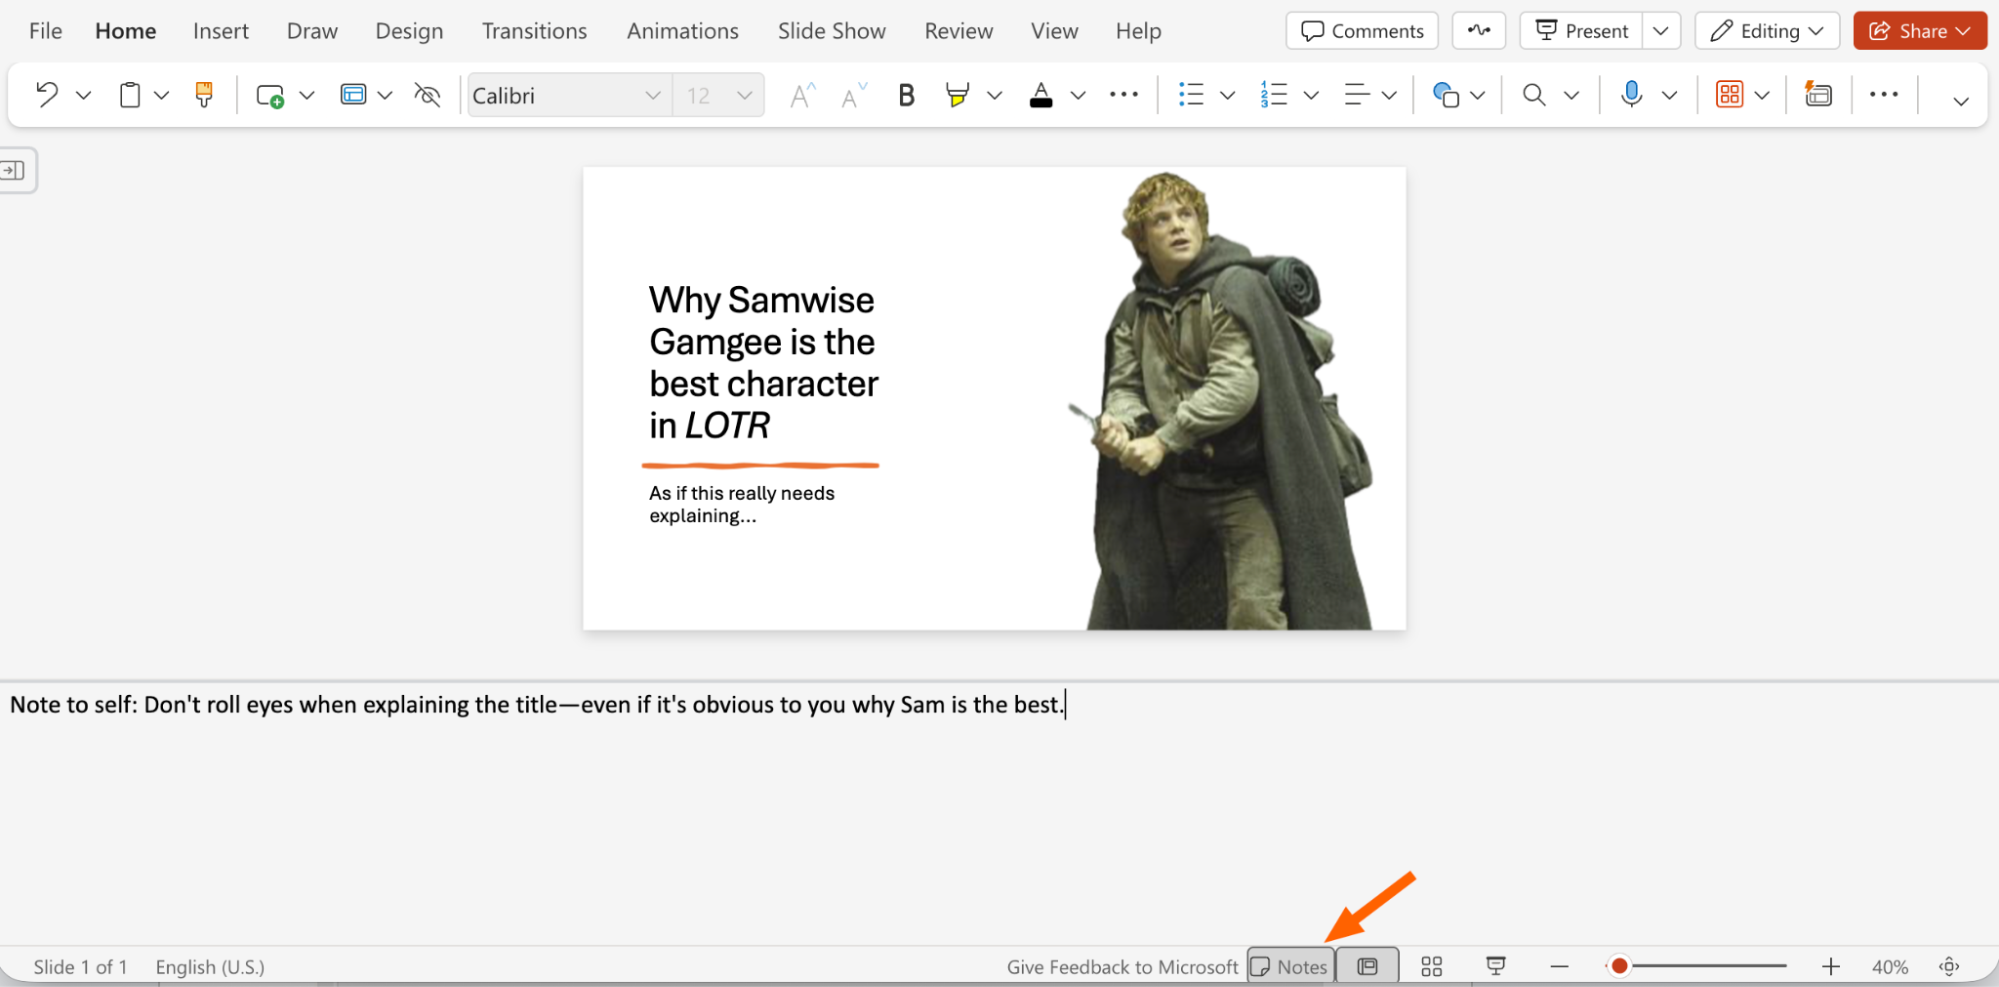
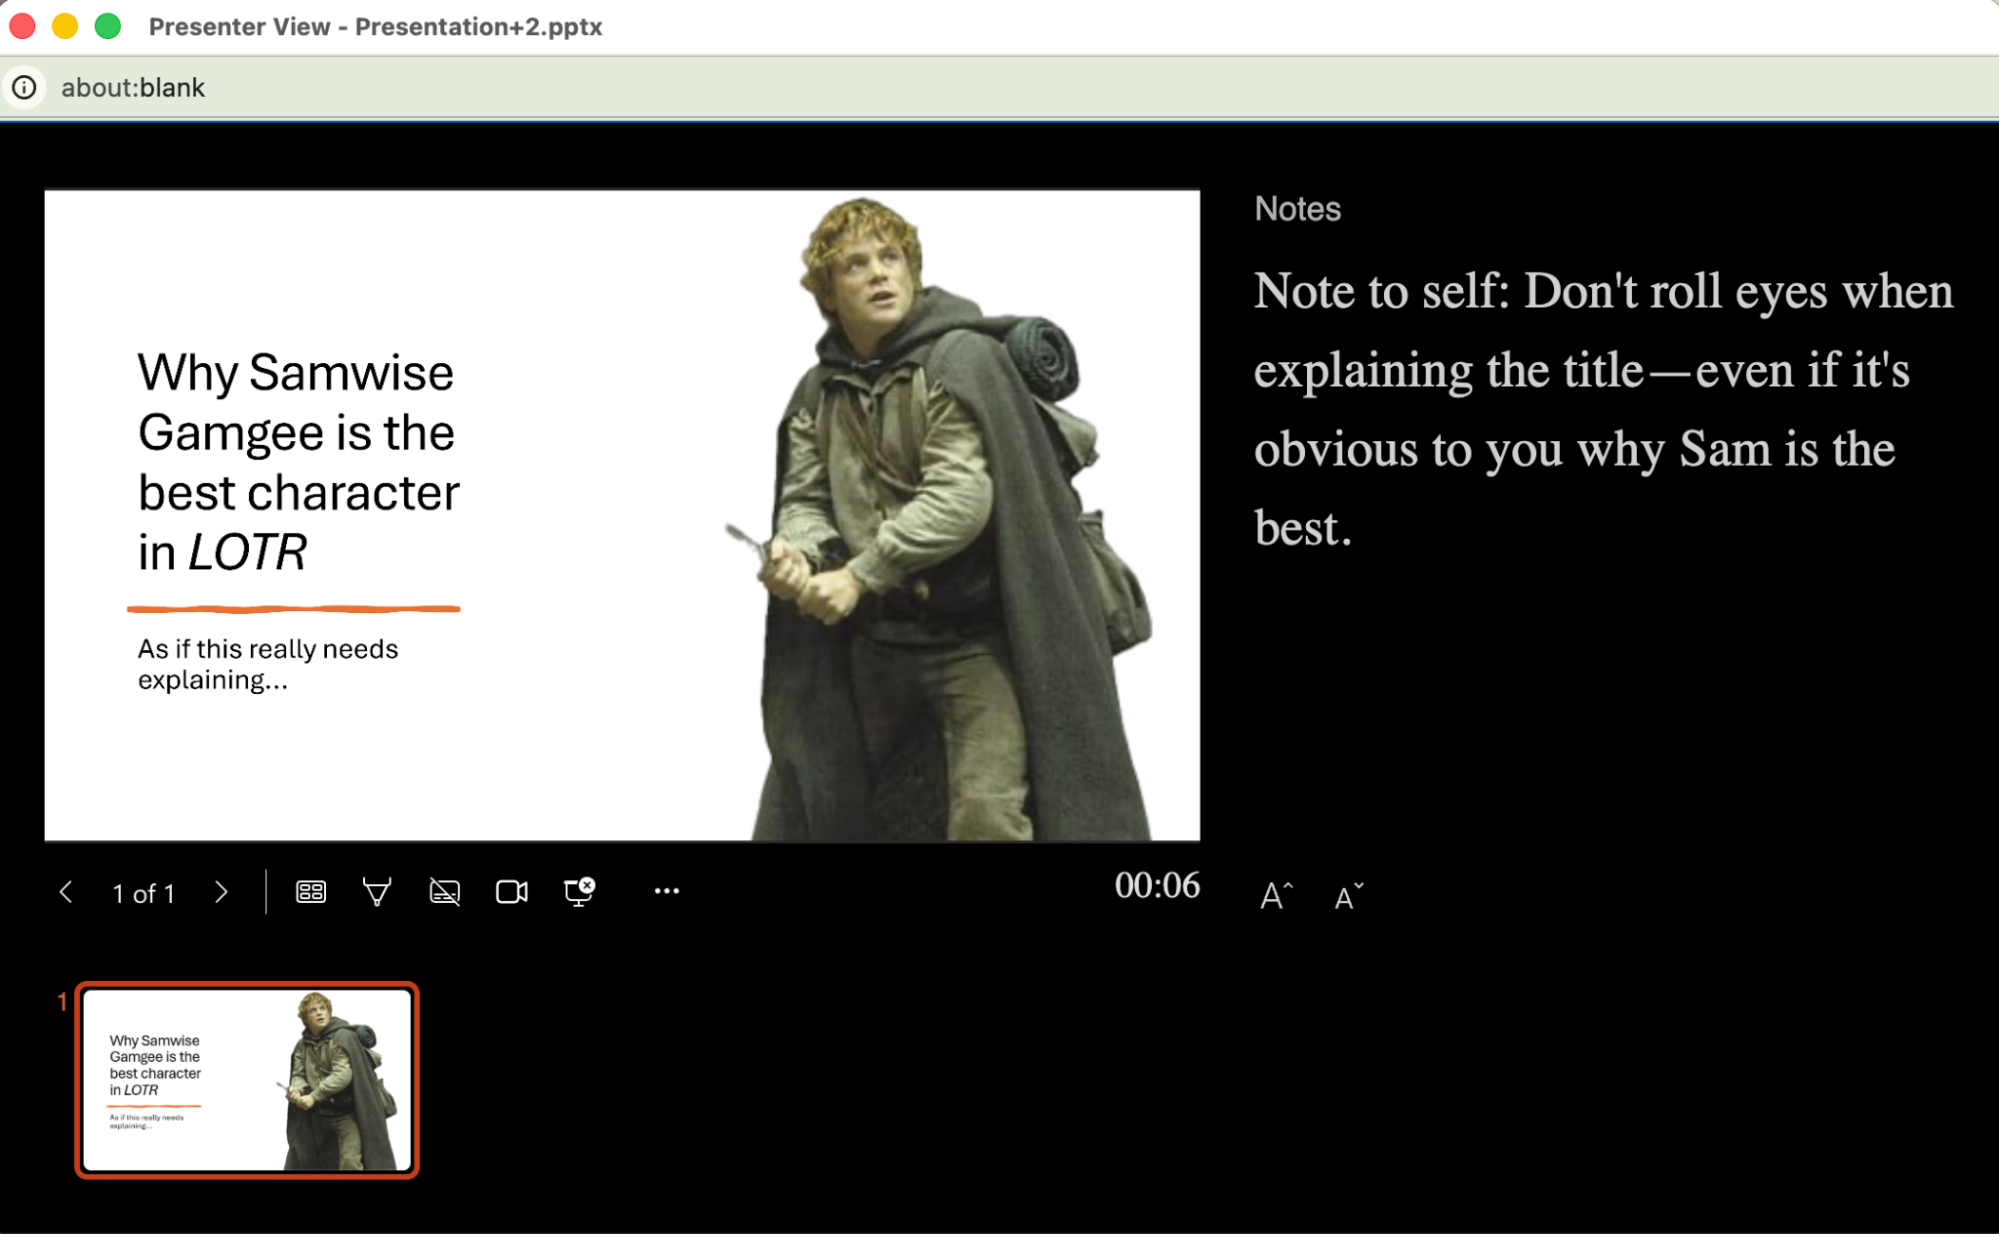
When you give your presentation in presenter view (more on that below), you’ll be able to see your notes alongside the slide deck, while the audience will see only the slides in full-screen view.
How to present PowerPoint with notes
Now that you’ve created your deck and added your notes, you’re ready to present your PowerPoint.
Click Slide Show in the ribbon, and select how you want to present:

-
From Beginning or From Current Slide. Use either of these if you’re presenting without presenter notes.
-
Presenter View. Use this option to present with a side-by-side view of your presentation and notes.
-
Present in Teams. If you’re sharing your deck in a Teams meeting, the seamless connection should save you from the classic, “Can you see my screen?”
How to share PowerPoint on Zoom
The local college I teach at lives in the Microsoft ecosystem—very few folks venture into apps outside of this bubble unless absolutely necessary. To this day, I have colleagues who still ask how to share PowerPoint on Zoom. So this is for all my colleagues (please stop asking me to repeat it).
Heads-up: The steps below are for how to do this using a dual monitor setup. This is the ideal way, especially if you have presenter notes, because it allows you to share your deck on one screen and view the presenter version on another. If you have a single monitor, you can start the presentation From Beginning or From Current Slide, and then share your screen. But you won’t be able to see your presenter notes.
-
Share your PowerPoint using Presenter View.
-
A slideshow-only version of your PowerPoint will appear on top of your presenter view. Drag and drop the slideshow to one monitor; leave the presenter view on the other.
-
Join the Zoom meeting like you normally would.
-
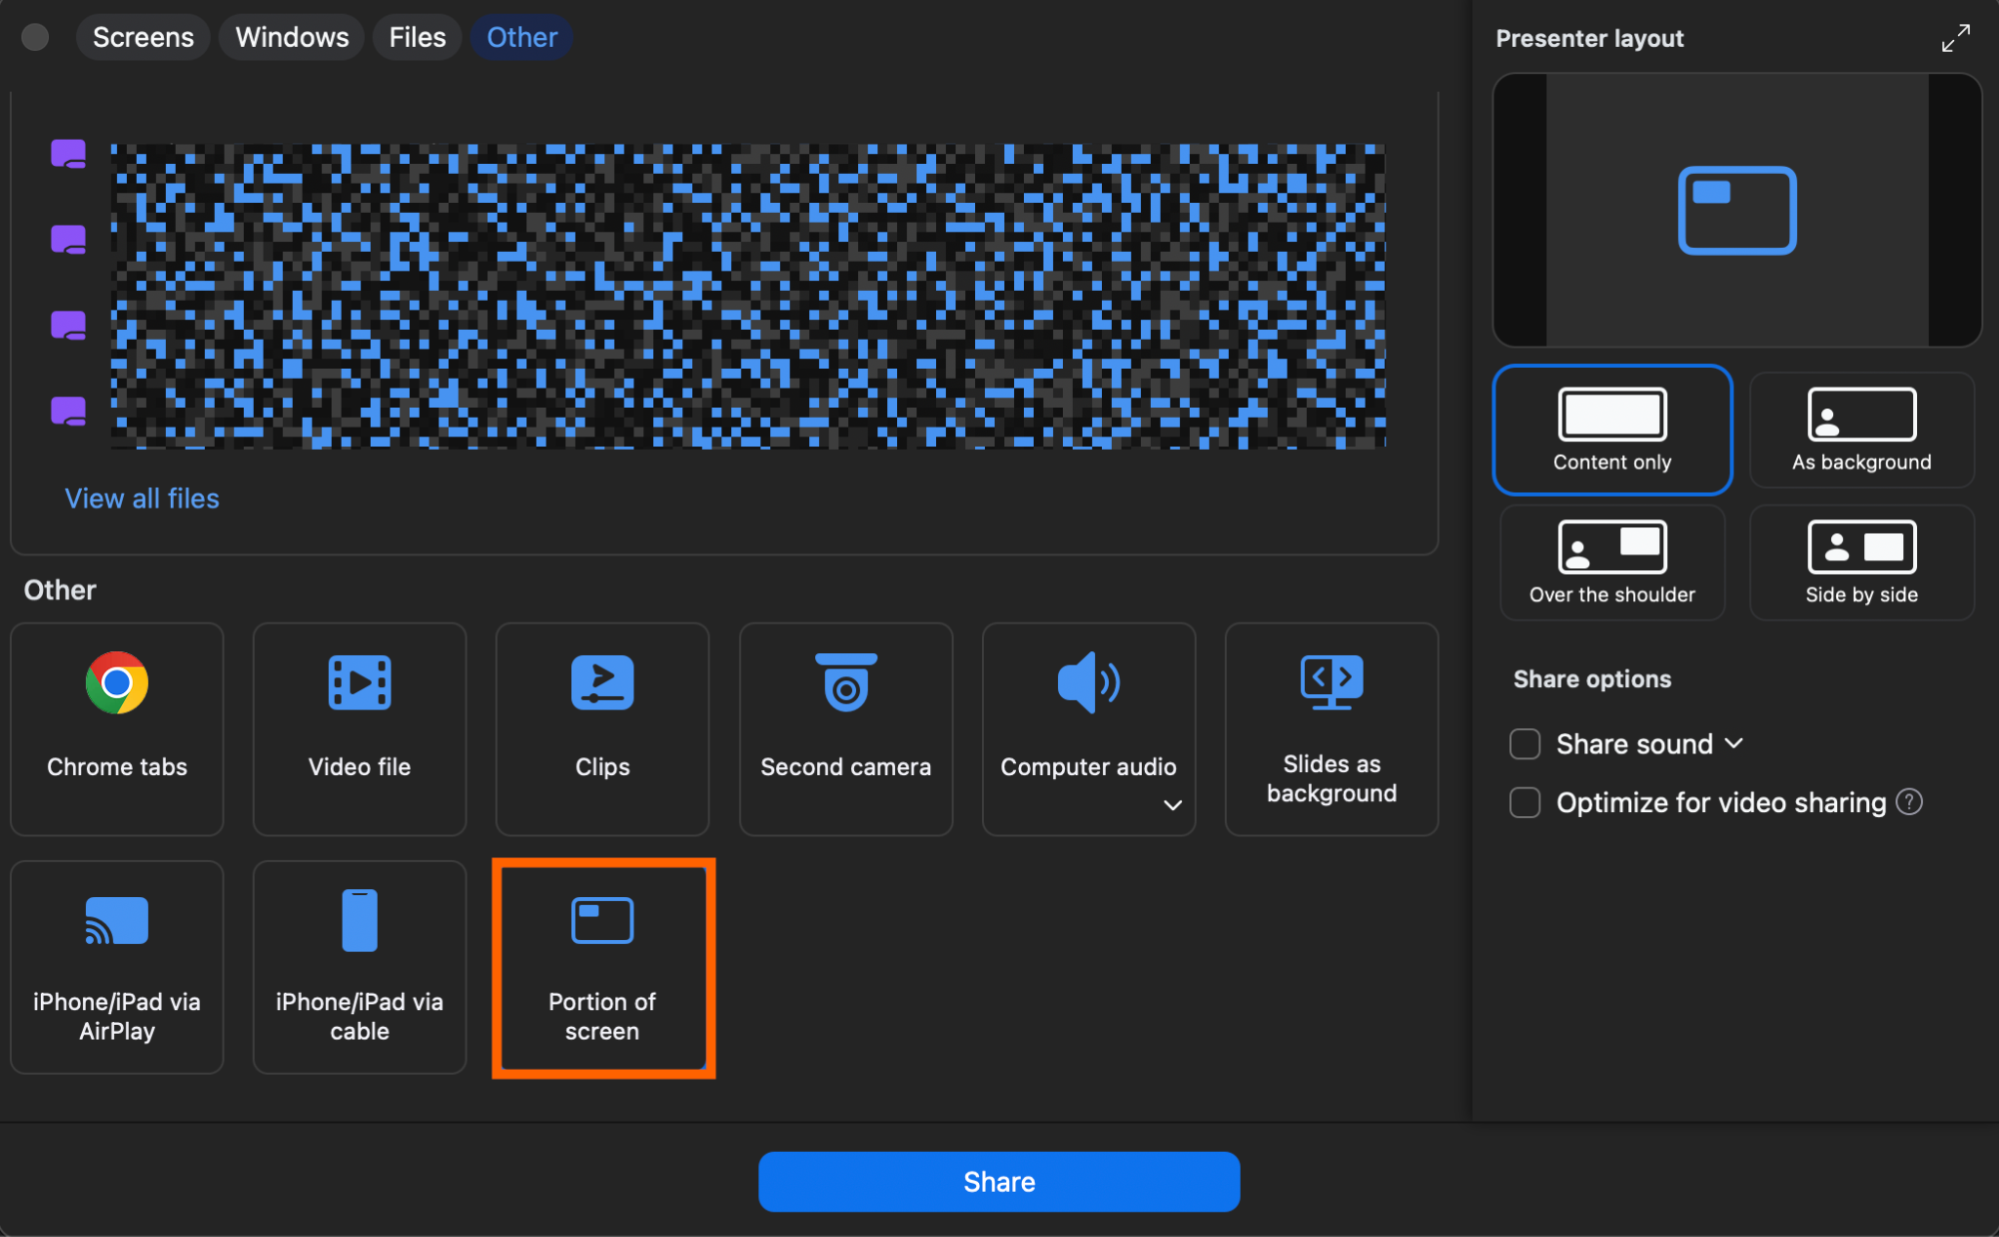
Click Share in the Zoom control bar (bottom of your screen).
-
Under More or Other (it varies depending on your version), click Portion of Screen.
-
Click Share.
-
Since the slideshow version shows your entire browser, drag the borders of the green box around only your slideshow to reduce distractions.

Automate your presentation with Zapier
Creating a PowerPoint presentation from the ground up is all fine and good when you want to give your favorite Tolkien character the respect he deserves. But if you’re building presentations at scale, or incorporating lots of data and talking points from other apps, use Zapier.
Zapier works where you already work, including ChatGPT and Claude. This means you can securely connect your AI chatbot with 9,000+ apps, describe what you want to build, and let it take care of the rest. If you want to share a recap on last quarter’s sales, for example, ask your AI assistant to pull your pipeline data from Salesforce, summarize the key wins and misses, and generate a slide-ready outline. Every connection runs through Zapier, so your credentials stay secure and you stay in control of what your AI can access.
Related reading:
This article was originally published in August 2018 by Matthey Guay and has also had contributions from Nicole Replogle. The most recent update was in October 2026.
Get productivity tips delivered straight to your inbox
We’ll email you 1-3 times per week—and never share your information.
Related articles







Improve your productivity automatically. Use Zapier to get your apps working together.